
Table of contents
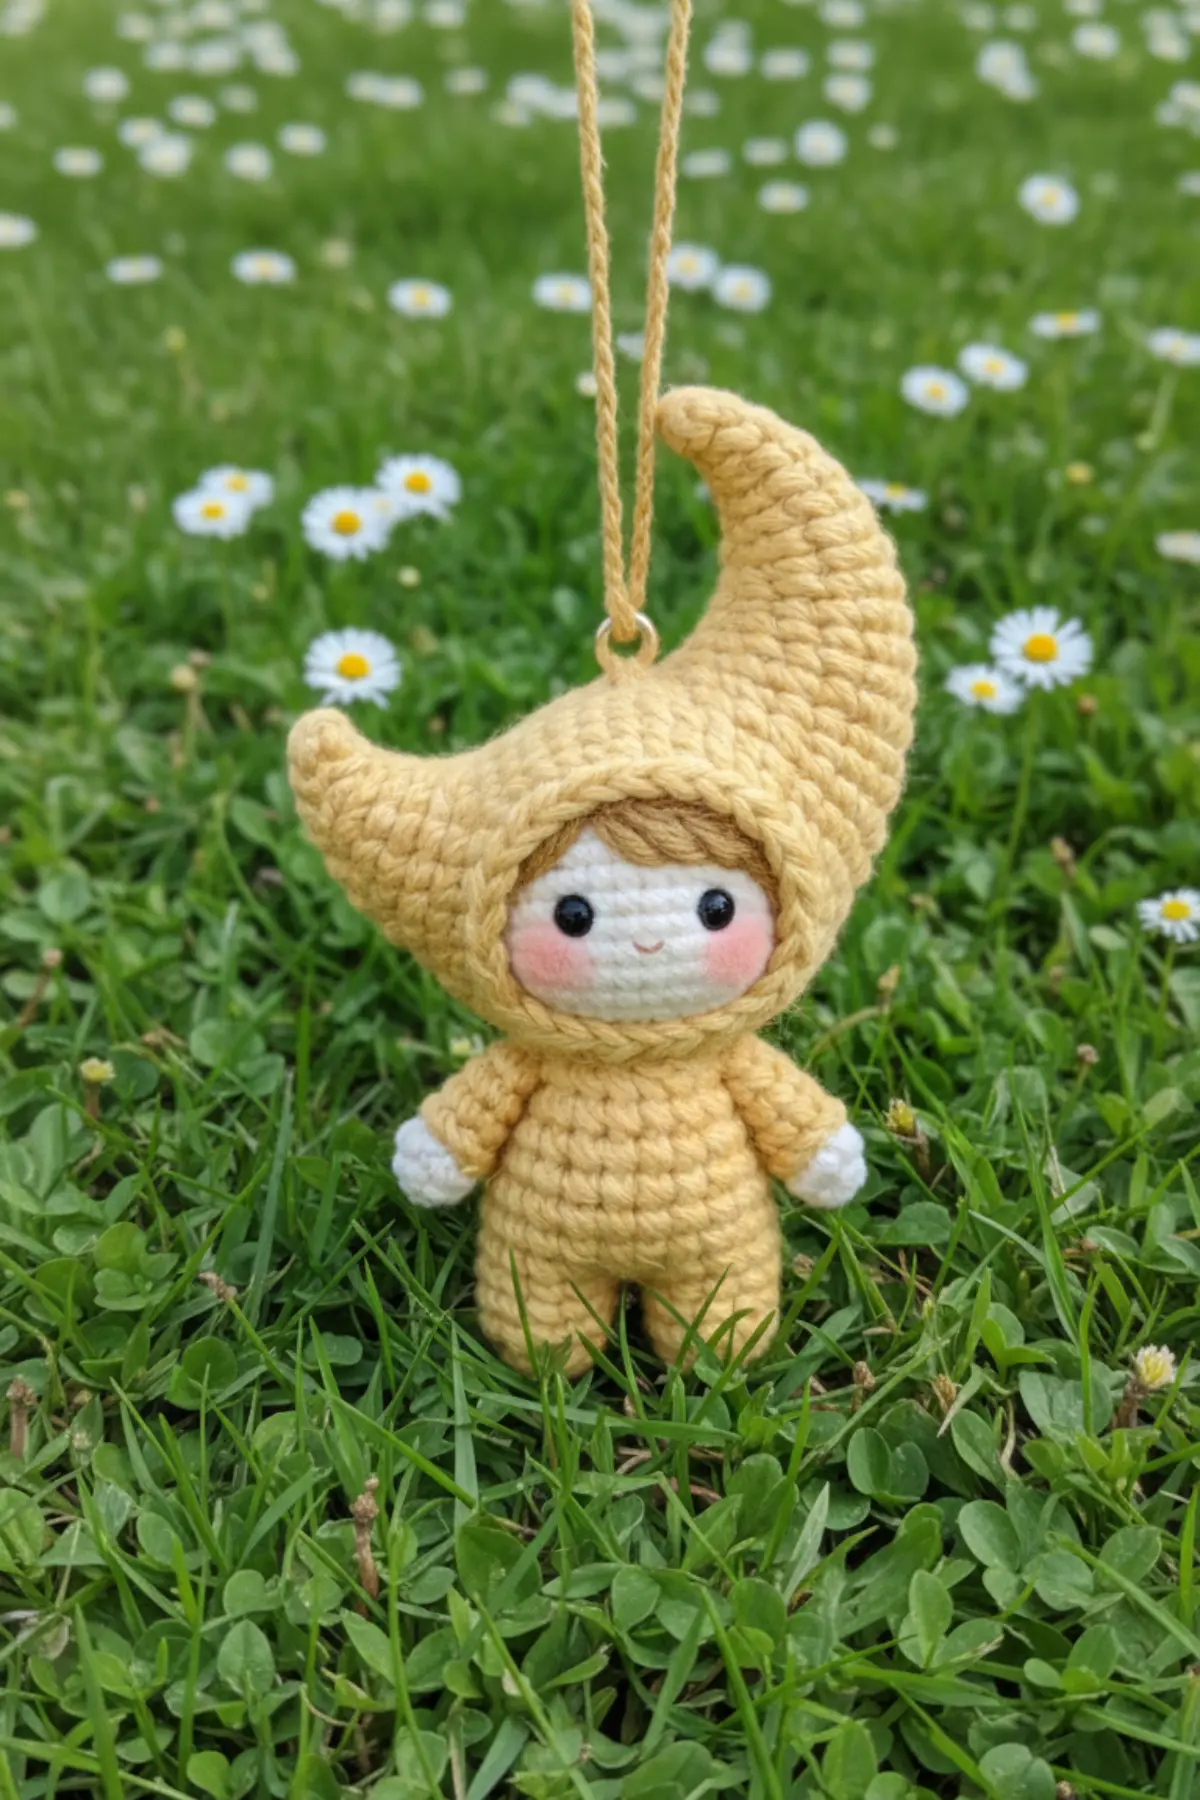
Imagine carrying a little piece of gentle starlight with you wherever you go – a tiny, adorable companion that brings a smile to your face and a touch of handmade magic to your everyday. Our ‘Moonlight Baby’ Amigurumi Doll pattern is designed for just that! Perfect as a whimsical keychain, a delightful bag charm, or a heartfelt handmade gift for someone special, this project is a joy to create. With its sweet crescent moon hat and snug jumpsuit, this little doll is sure to brighten any day.
Materials & Tools
Yarn Colors (4-ply combed cotton – SuSuJie brand):
- Yellow: #10 (Hat, Jumpsuit)
- Skin tone: #01 (Face)
- Brown: #25 (Hair)
- Pink: #14 (Blush/ Cheeks)
- Black: #06 (Eyes)
Tools:
- 2.0 mm crochet hook
- Tapestry (sewing) needle
- Fiberfill stuffing
- 8 mm black safety eyes
- Yellow crocheted hanging cord
- Metal key ring
Stitch Abbreviations
- MR – Magic Ring
- SC – Single Crochet
- INC – Increase (2 SC in the same stitch)
- DEC – Decrease (single crochet 2 stitches together)
- CH – Chain
- SL ST – Slip Stitch
Bringing Your Moonlight Baby to Life: The Crochet Pattern
1. Face (Skin color #01)
- R1: MR, 6 SC (6)
- R2: 6 INC (12)
- R3: (SC, INC) × 6 (18)
- R4: (2 SC, INC) × 6 (24)
- R5– R6: 24 SC (2 rounds). Insert safety eyes, embroider blush, lightly stuff.
- R7: (2 SC, DEC) × 6 (18)
- R8: (SC, DEC) × 6 (12)
- R9: 6 DEC (6). Fasten off.
2. Hat (Yellow #10 – Crescent Shape)
- R1: CH 15, starting from the 2nd CH from hook, 14 SC (14)
- R2: (SC, INC) × 7 (21)
- R3– R5: 21 SC for 3 rounds, gradually shaping the crescent curve
- R6: (2 SC, DEC) × 7 (14)
- At the top, leave CH 5 as a hanging loop. Sew short strands of brown yarn (#25) inside the hat as hair. Insert the face into the front opening of the hat.
3. Jumpsuit Body (Yellow #10)
- R1: MR, 8 SC (8)
- R2: 8 INC (16)
- R3: (SC, INC) × 8 (24)
- R4– R8: 24 SC for 5 rounds. Leave opening for the face. Stuff with fiberfill.
- R9: (3 SC, DEC) × 6 (18) – waist shaping
- Crochet limb outlines at the bottom:
- Front arms: CH 8 on each side, SC along the chain
- Back legs: CH 10 on each side, SC along the chain
- Use skin- tone yarn (#01) to crochet small hands and feet at the ends.

Assembling Your Moonlight Baby
- Insert the face into the hat opening and sew brown hair above the face.
- Sew the hat to the jumpsuit body, adjusting the crescent hat shape.
- Thread the yellow hanging cord through the metal key ring and attach it to the CH 5 loop on top of the hat.
- Check stuffing firmness and facial details. Your hanging amigurumi is complete.
Frequently Asked Questions
This pattern is suitable for advanced beginners to intermediate crocheters. Basic amigurumi skills like magic ring, single crochet, increases, and decreases are essential to confidently create your Moonlight Baby.
Absolutely! While the pattern specifies 4-ply combed cotton, you can use other yarns. Just ensure your hook size matches your chosen yarn to maintain tight stitches, which is crucial for amigurumi stuffing. Your doll’s final size may vary.
The instructions involve gradual shaping through single crochet rounds. Ensure your tension is consistent. Lightly stuffing the hat if needed (though the face provides some internal structure) can also help maintain its lovely crescent curve.
If safety eyes aren’t available, you can easily embroider the eyes using black embroidery floss or a thin strand of black yarn. This gives the doll a soft, charming, and child-safe handmade look.
Congratulations, maker! You’ve just created your very own enchanting Moonlight Baby Amigurumi Doll. Whether it’s guarding your keys, adorning your bag, or bringing joy as a thoughtful gift, this little creation is a testament to your craft. Embrace the magic of making, and happy crocheting!