Table of contents
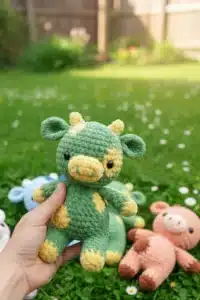
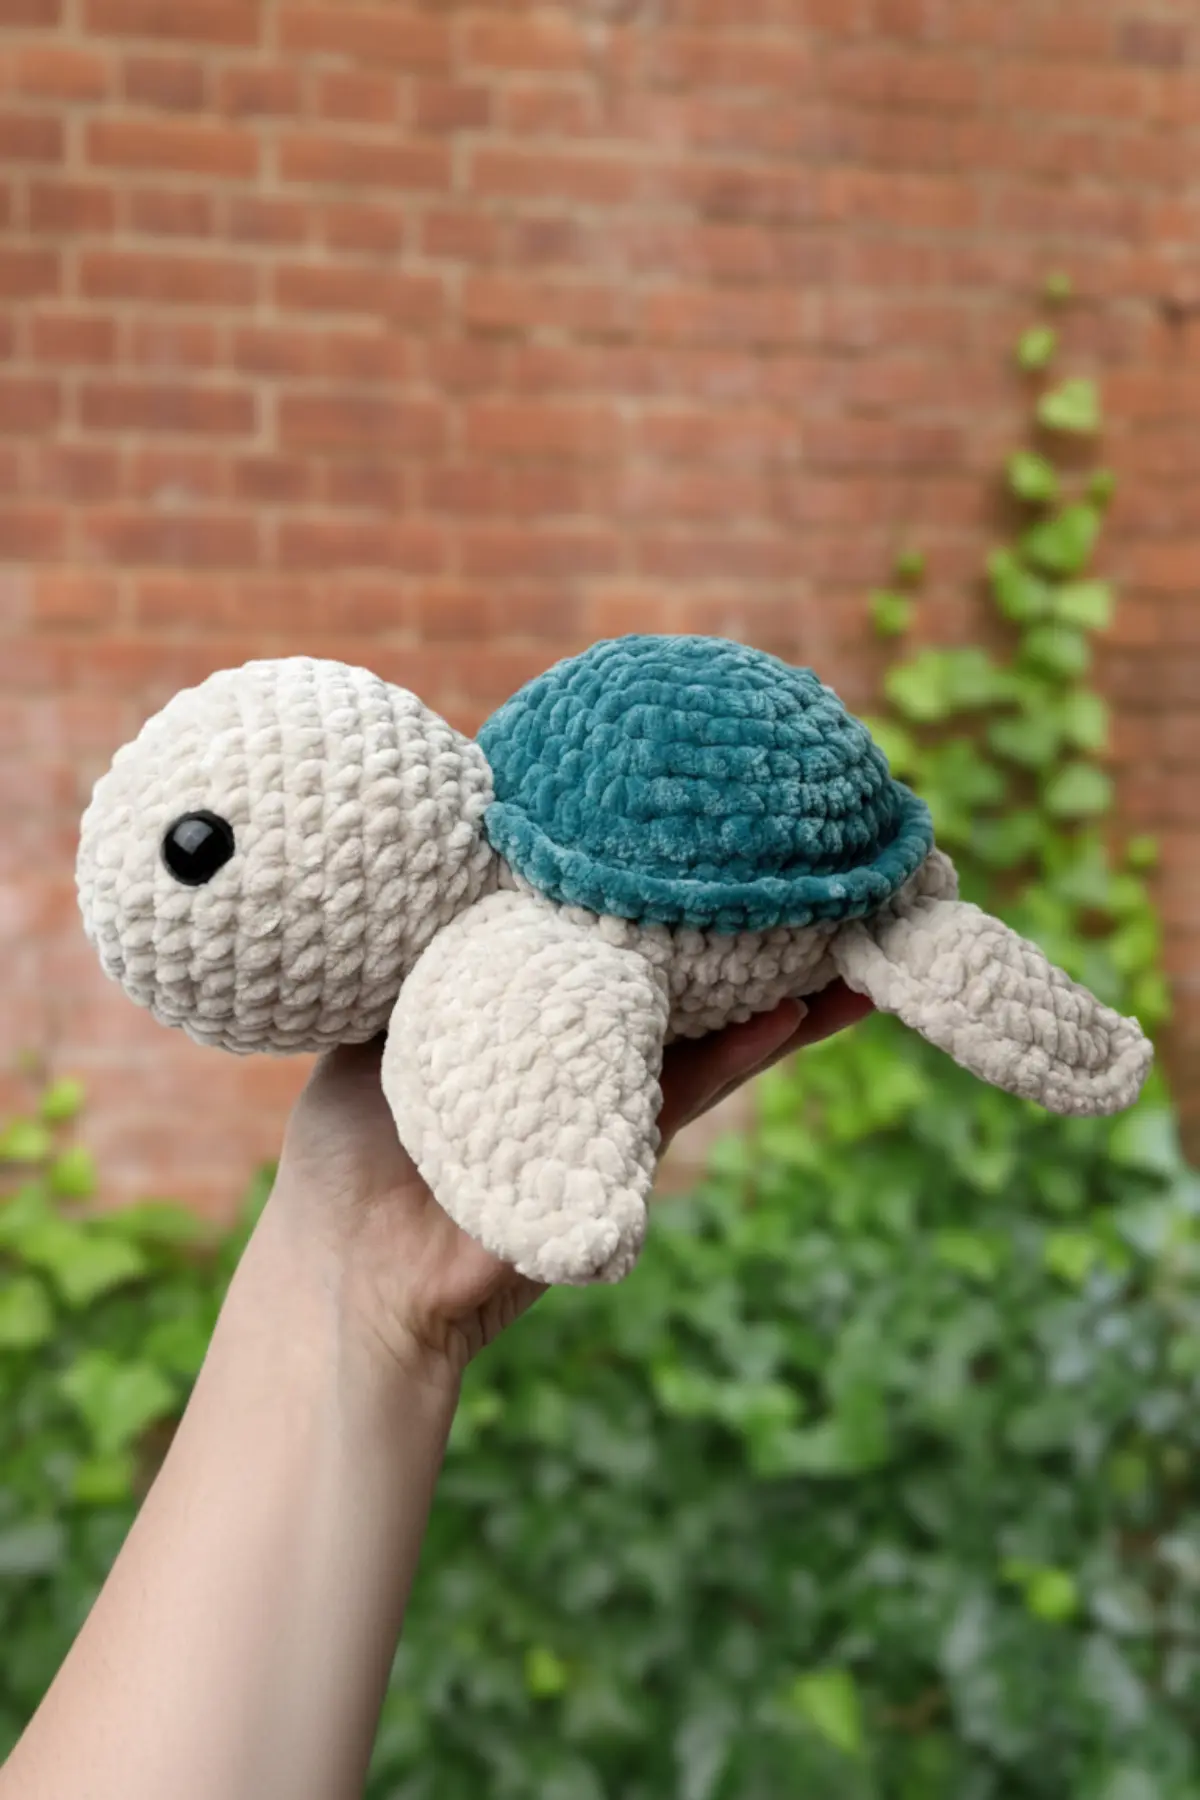
Imagine a soft, chunky, huggable friend that fits perfectly in little arms or adds a touch of whimsy to any space. That’s exactly what you’ll create with our adorable Tammy Turtle crochet pattern! Designed with cozy super bulky yarn, this charming amigurumi turtle comes to life with simple stitches and a whole lot of love. Whether you’re making a special gift or adding to your own collection of handmade treasures, Tammy Turtle promises to be a delightful project from start to finish.
This Tammy Turtle Crochet Pattern is perfect for crocheters who love plush, chunky amigurumi projects that are both beginner-friendly and adorable.
Materials
- Super Bulky/Super Chunky plush yarn:
- In beige/cream for the head, limbs, and belly
- In your choice of color for the shell (e.g., Hobbii Baby Snuggle Solid in Soft Sand and Light Petrol Blue, or Himalaya Dolphin Baby)
- US size G/4.25mm or 4.5mm crochet hook
- Yarn needle
- Stitch markers
- Polyester filling
- 12-15mm safety eyes
The Tammy Turtle Crochet Pattern works best with super bulky plush yarn to achieve its soft texture and huggable size.
Abbreviations & Stitches
- MR: Magic ring
- St(s): Stitch(es)
- SC: Single crochet
- Ch: Chain stitch
- Sk: skip a stitch
- Sl st: Slip stitch
- BLO: Stitch into the back loops only
- FLO: Stitch into the front loops only
- Inc: Increase (Stitch 2 SC into the stitch)
- Dec: SC decrease using the invisible method
- (…) x n: Repeat instructions in brackets n times
Important Notes for Your Crochet Journey
- This pattern is written using US crochet terms.
- Using a stitch marker at the start or end of each round or row can be incredibly helpful for keeping track of your stitches, especially with plush yarn.
- The final size of your Tammy Turtle may vary depending on your chosen yarn and individual tension. The turtle pictured measures approximately 25cm (10 inches) long.
- This pattern is intended for personal use. While we encourage you to share your beautiful finished creations, please do not distribute or share the pattern itself.
- You are welcome to sell any items you make from this pattern. We love seeing your handmade creations find new homes!
Pattern Instructions
Head
- R1: 6 SC in a MR (6)
- R2: Inc x 6 (12)
- R3: (SC, inc) x 6 (18)
- R4: (2 SC, inc) x 6 (24)
- R5: (3 SC, inc) x 6 (30)
- R6: (4 SC, inc) x 6 (36)
- R7-11: 36 SC (6 rounds of 36)
- Insert the safety eyes between R6 and R7, 12 sts apart
- R12: (4 SC, dec) x 6 (30)
- R13: (3 SC, dec) x 6 (24)
- R14: (2 SC, dec) x 6 (18)
- Sl st to close. Cut the yarn, leaving a long tail for sewing
- Stuff the head
Front Legs
- (Make 2)
- R1: 7 SC in a MR (7)
- R2: Inc x 7 (14)
- R3: (SC, inc) x 7 (21)
- R4: (2 SC, inc) x 7 (28)
- R5: (3 SC, inc) x 7 (35)
- R6: (4 SC, inc) x 7 (42)
- Fold the leg into a semi circle, and crochet the two sides together with 21 SC
- Close and cut the yarn, leaving a long tail for sewing
- For one of the front legs:
- Use a yarn needle to pull the tail through to the opposite end of the leg (this ensures that both legs are symmetrical)
Back Legs
- (Make 2)
- R1: 7 SC in a MR (7)
- R2: Inc x 7 (14)
- R3: (SC, inc) x 7 (21)
- R4: (2 SC, inc) x 7 (28)
- R5: (3 SC, inc) x 7 (35)
- Fold the leg into a semi circle, and crochet the two sides together with 17 SC (one st will be left unstitched from the 35 sts)
- Close and cut the yarn, leaving a long tail for sewing
- For one of the back legs:
- Use a yarn needle to pull the tail through to the opposite end of the leg (this ensures that both legs are symmetrical)
Tail
- The tail’s stitches can be hard to see with this chunky yarn; it makes it easier to use a stitch marker at the start/ends of the rounds and to work slowly.
- R1: 4 SC in a MR (4)
- R2: Inc x 4 (8)
- R3-5: 8 SC (3 rounds of 8)
- Sl st to close. Cut the yarn, leaving a long tail for sewing.
Shell
- R1: 6 SC in a MR (6)
- R2: Inc x 6 (12)
- R3: (SC, inc) x 6 (18)
- R4: (2 SC, inc) x 6 (24)
- R5: (3 SC, inc) x 6 (30)
- R6: (4 SC, inc) x 6 (36)
- R7: (5 SC, inc) x 6 (42)
- R8: (6 SC, inc) x 6 (48)
- R9: 48 SC
- Put a stitch marker in the back loop of the first stitch of R9. This will help you find the stitch later, as the plush yarn can make it hard to see.
- R10: 48 SC in FLO (48)
- The belly continues straight from the shell
Belly
- Colour change to beige/cream yarn
- R11: 48 SC in back loops of R9 (this will start at the stitch marker from earlier)
- R12: (Both loops) 5 SC, 4 ch, sk 4, 8 SC, 3 ch, sk 3, 3 SC, 2 ch, sk 2, 3 SC, 3 ch, sk 3, 8 SC, 4 ch, sk 4, 5 SC (48)
- R13: (6 SC, dec) x 6 (42)
- R14: (5 SC, dec) x 6 (36)
- Do not close
- Place the legs and tail in the holes:
- Front legs: in the ch 4 spaces
- Back legs: in the ch 3 spaces
- Tail: in the ch 2 space
Use a yarn needle to sew each leg and tail in place on the inside of the shell, working through each stitch.
- Now continue with the belly:
- R15: (4 SC, dec) x 6 (30)
- R16: (3 SC, dec) x 6 (24)
- R17: (2 SC, dec) x 6 (18)
- R18: (SC, dec) x 6 (12)
- Stuff the body
- R19: Dec x 6 (6)
- Close and cut the yarn, leaving a long tail for sewing
- Stuff the body
Finishing Touches
Use the remaining tail from the body to sew the hole closed neatly. Next, carefully sew the head in place, ensuring the safety eyes are centered and aligned with the body. It can be very helpful to pin the head in place first to check the positioning before committing to sewing.

Frequently Asked Questions
This pattern is designed for super bulky or super chunky plush yarn, such as Hobbii Baby Snuggle Solid or Himalaya Dolphin Baby. This type of yarn gives Tammy her wonderfully soft and huggable texture.
When using super bulky yarn and maintaining a consistent tension, your finished Tammy Turtle should measure approximately 25cm (10 inches) long. Slight variations may occur depending on your specific yarn and hook size.
Plush, bulky yarns can sometimes make stitches harder to see. We recommend using a stitch marker at the beginning or end of each round to help you keep track. Working slowly and ensuring good lighting can also make a big difference.
Yes, absolutely! You are welcome to sell any items you create using this pattern. We love supporting makers and their handmade businesses.
Congratulations! Your very own Tammy Turtle is now complete! We hope you enjoyed every stitch of bringing this sweet friend to life. If you have any questions along the way, don’t hesitate to reach out. We’d also love to see your beautiful creations – please tag me on Instagram @rose.liy.amigurumi or follow @roselilyamigurumi on TikTok for updates and new patterns. Happy crocheting!