Table of contents
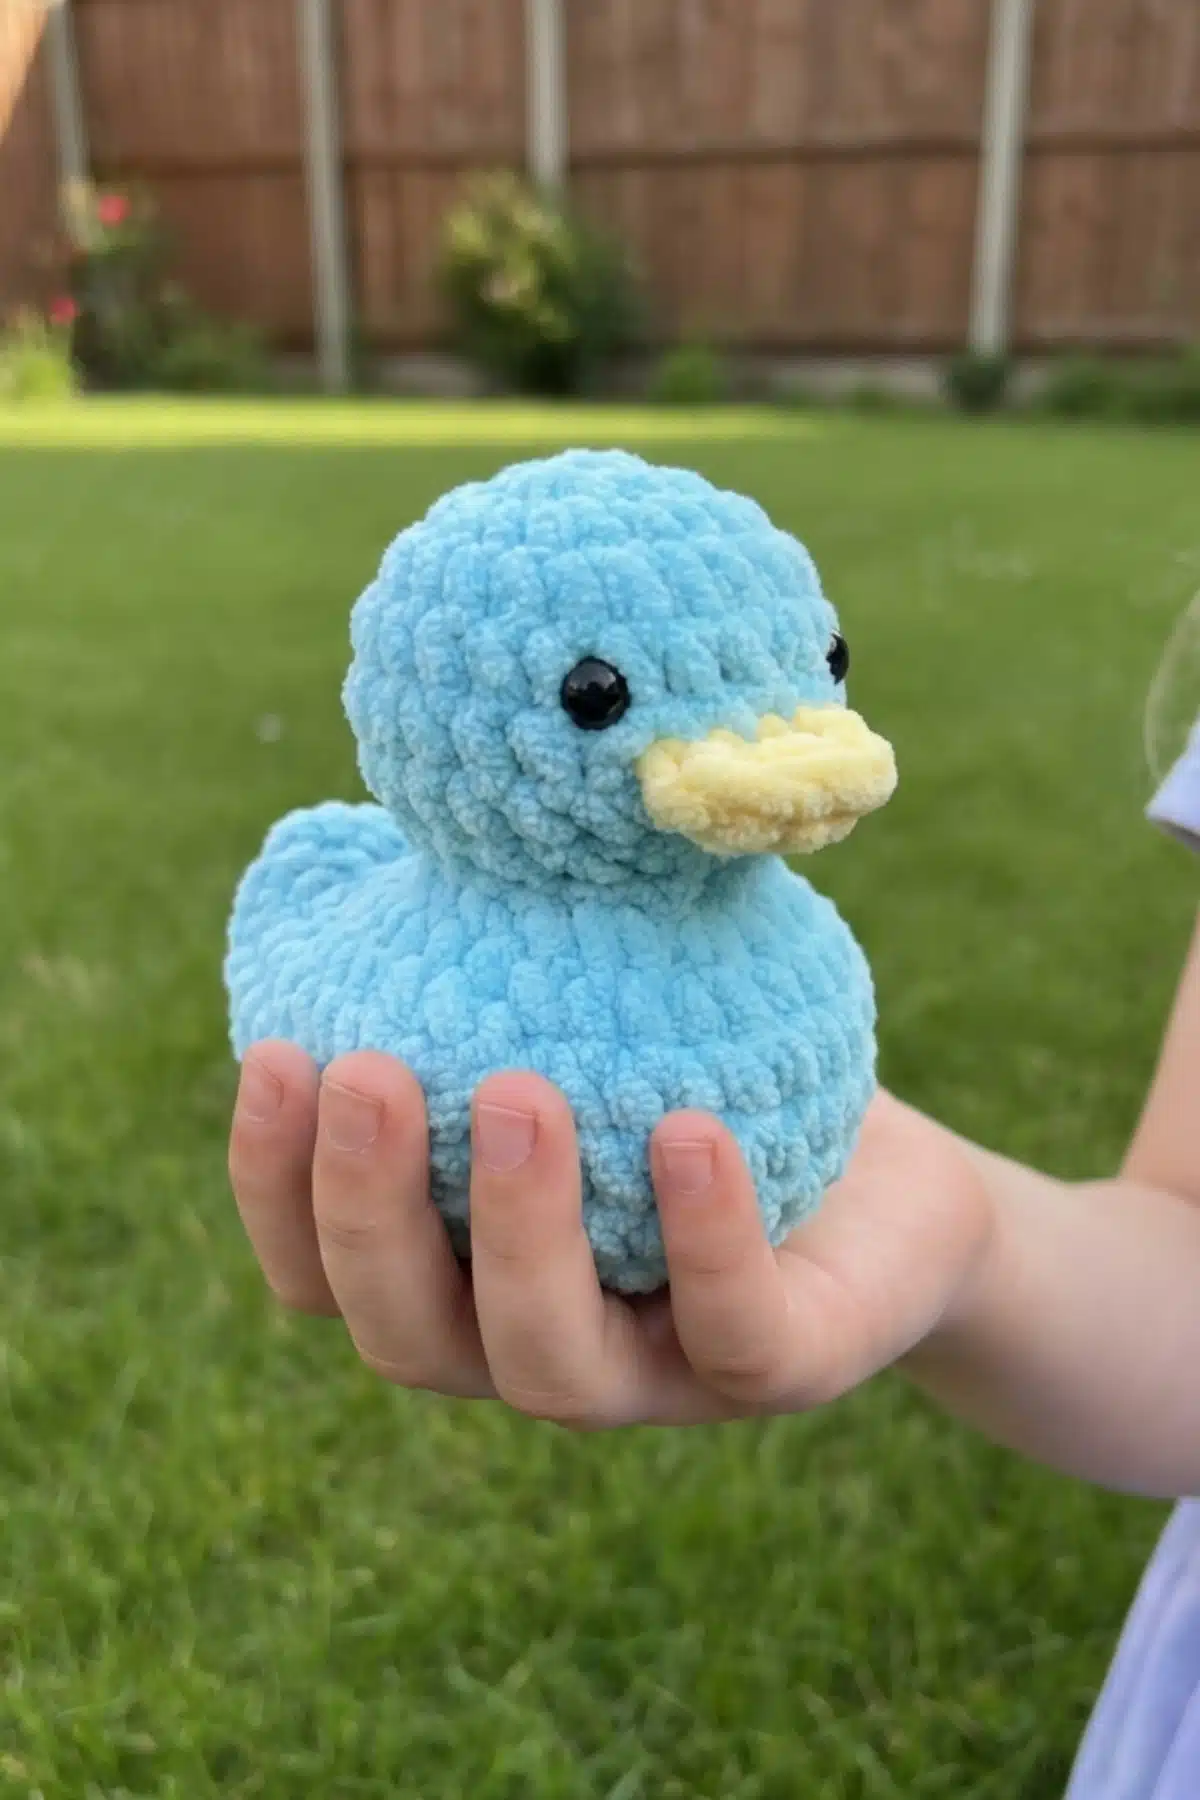
There’s something undeniably cheerful about a classic rubber duck, and this Amigurumi Rubber Duck Pattern makes it easy to crochet your own adorable version. This free amigurumi rubber duck pattern is perfect for beginners who want to create a cute handmade toy, nursery decoration, or thoughtful gift. With simple stitches and clear instructions, this crochet duck project is both fun and rewarding.
Materials You’ll Need
To bring your adorable rubber duck to life, gather these basic amigurumi supplies:
- Worsted weight yarn in yellow (main color)
- Small amount of orange yarn (for the beak)
- Crochet hook (size suitable for your yarn, typically 3.0mm – 4.0mm)
- Safety eyes (recommended 8mm)
- Stuffing (polyester fiberfill)
- Yarn needle
- Scissors
- Stitch marker (optional, but very helpful for working in the round)
Get Started: Amigurumi Rubber Duck Pattern
This amigurumi rubber duck pattern is worked in continuous rounds and is suitable for both beginners and experienced crocheters who love making cute animal toys.
Main Body (Yellow Yarn)
- 8 Sc into Magic Ring
- Inc around
- Sc, Inc x 8
- Sc around
- Sc around
- Sc around
- Sc around
- Dec around
- Inc around, chain 5 crochet 4 sc down the chain and 1 sc back into the last stitch of the base (where we started the chain)
- Sc 24, 5 Sc in the back of the chain, 4 sc down the chain and 1 Sc in the base (34)
- Sc around (34)
- Sc around (34)
- Sc around
- Sc 27, dec x2, sc 3
- Sc 2, dec x 8
- Sc, dec x8
- Dec around
- Sew close
Eyes Placement
Put the eyes between row 4 and 5, 5 stitches apart.
Beak (Orange Yarn)
- Start with a slipknot and chain 4
- 3 Sc down the chain
- Cut the yarn and sew between row 5 and 6
German Rubber Duck Pattern (Version 1)
For our German-speaking crocheters, here is an alternative version of the pattern instructions:
- 8 fm in den Fadenring (8)
- Alle verdoppeln (16)
- 1 x FM, 1 x verdoppeln x8 (24)
- 24 FM
- 24 FM
- 24 FM
- 24 FM
- 12 x abnehmen (12)
- 12 x verdoppeln (24), 5 Luftmaschen häkeln, 4 feste Maschen in die Luftmaschen und wieder eine feste Masche in die selbe Masche der letzten Reihe (Reihe 8 letzte Masche)
- 24 feste Maschen, 5 feste Maschen in den hinteren Faden der Luftmaschen und 5 feste Maschen auf die anderen Seite (34)
- 34 FM
- 34 FM
- 34 FM
- 27 FM, 2x abnehmen, 3 FM
- 2x FM, abnehmen x8 (24)
- FM, abnehmen x8 (16)
- Abnehmen x8 (8)
- Zunähen
Schnabel: 5 Luftmaschen, 4 feste Maschen in die Luftmaschen
Augen: 8mm, zwischen Reihe 4 und 5, 4 bis 5 Stiche auseinander
German Rubber Duck Pattern (Version 2)
And a second German version with slight variations:
- 8 feste Maschen in den Fadenring(8)
- Alle Maschen verdoppeln (16)
- 1 x feste Masche, 1 x verdoppeln x8 (24)
- 24 x feste Masche
- 24 x feste Masche
- 24 x feste Masche
- 24 x feste Masche
- 12 x abnehmen (12)
- 12 x verdoppeln (24), 5 Luftmaschen machen, 4 feste Maschen in die Luftmaschen und wieder eine feste Masche in die selbe Masche der letzten Reihe (Reihe 8 letzte Masche)
- 24 feste Maschen, 5 feste Maschen in den hinteren Faden der Luftmaschen und 5 feste Maschen auf die anderen Seite (34)
- 34 feste Maschen
- 34 feste Maschen
- 34 feste Maschen
- 27 feste Maschen, 2x abnehmen, 3 feste Maschen (32)
- 2 x feste Maschen, abnehmen x8 (24)
- feste Masche, abnehmen x 8
- 8 x abnehmen
- Zunähen
Schnabel: 5 Luftmaschen, 4 feste Maschen in die Luftmaschen
Augen: 8mm, zwischen Reihe 4 und 5, 4 bis 5 Stiche auseinander

Frequently Asked Questions
Worsted weight yarn is generally recommended for amigurumi as it’s easy to work with and creates a firm, huggable fabric. Cotton or acrylic blends are both great choices, offering durability and a good stitch definition for your duck.
A magic ring (also known as a magic circle or adjustable ring) is crucial for amigurumi as it creates a tightly closed center, preventing a hole. You can find many video tutorials online for this technique; it involves making a loop, crocheting into it, and then pulling the tail to close the center hole snugly.
Stuff your amigurumi firmly and evenly with polyester fiberfill. Use small pieces at a time to avoid lumps, ensuring the shape holds well. Make sure to stuff the head and body before the opening gets too small to work comfortably.
Yes, you can absolutely adjust the size of the safety eyes! 8mm is a suggestion, but 6mm or 10mm could also work depending on your preferred aesthetic and the overall size of your finished duck. Just ensure they are securely fastened for safety, especially if the duck is for a child.
Congratulations on embarking on this delightful crochet journey! Creating your own amigurumi rubber duck is a rewarding experience, and you’ll love the charming result. Whether it’s a gift or a new friend for your home, your handmade duck carries a special touch. Don’t forget to share your finished creations with our crafting community – we’d love to see them!