Table of contents
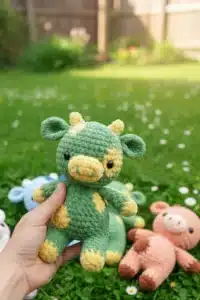
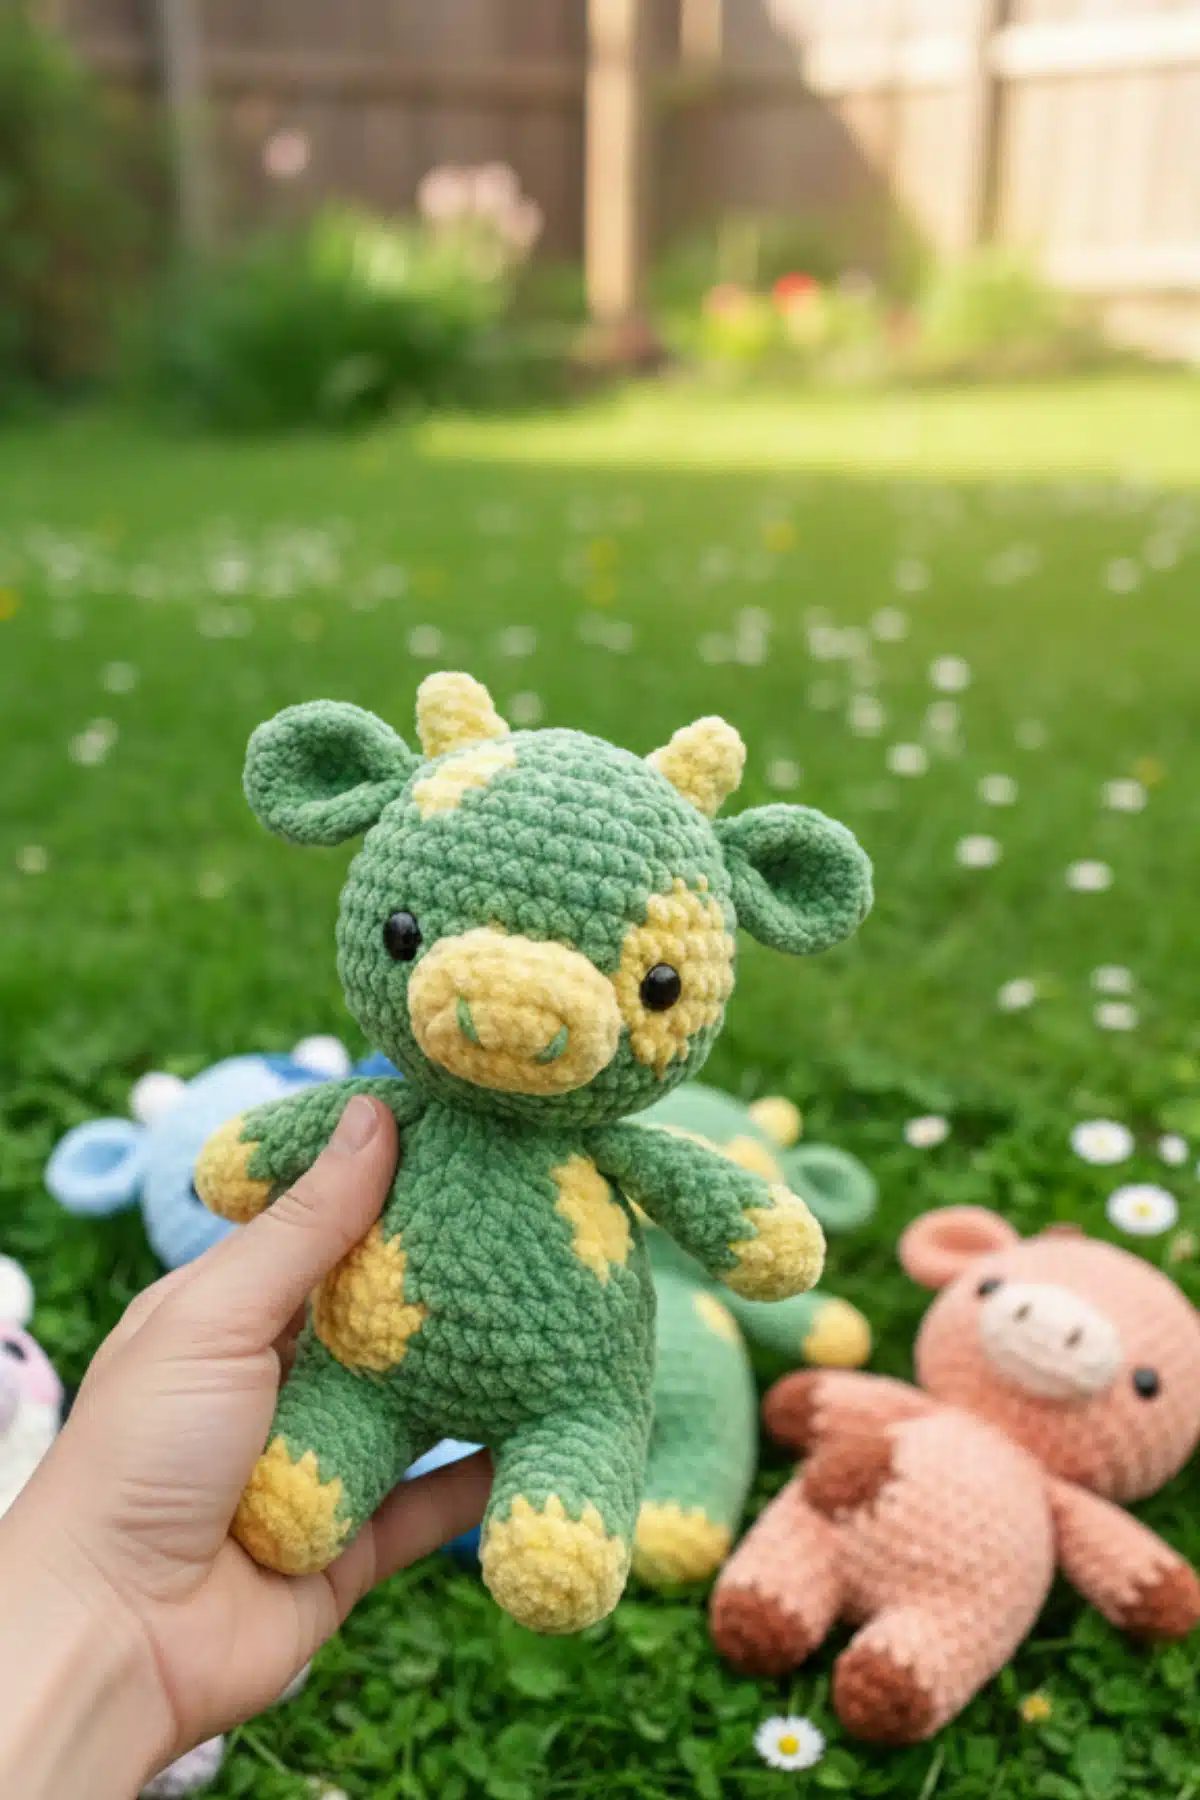
This Baby Cow Amigurumi Pattern is the perfect free crochet project for anyone who loves soft, plush farm animals. Designed to be beginner-friendly and irresistibly cuddly, this crochet cow makes a wonderful baby gift, nursery decoration, or handmade market item. If you’re looking for a detailed and easy baby cow amigurumi pattern, you’re in the right place!
Materials Needed for the Baby Cow Amigurumi
To begin your adorable baby cow, gather these essentials:
- YARNS (I used Himalaya Dolphin Baby)
- HOOK (I used 4 mm)
- SAFETY EYES (I used 12 mm, you can embroider the eyes or use felt)
- DARNING NEEDLE to sew body parts
- STUFFING
- SCISSORS
Stitch Abbreviations
Familiarize yourself with these common crochet abbreviations to follow the pattern with ease:
- MR – magic ring
- INC – increase
- SC – single crochet
- DEC – decrease
- CH – chain
- SLST – slip stitch
- F.O. – fasten off
Let’s Start Crocheting!
Head
- R1: 7 SC in MR (7)
- R2: 7 inc (14)
- R3: (1SC, inc) x 7 (21)
- R4: (2SC, inc) x 7 (28)
- R5: (3SC, inc) x 7 (35)
- R6-7: SC in each (35)
- R8: 18SC, 4SC, 14SC (35)
- R9: 17SC, 0SC, 12SC (30)
- R10: 17SC, 10SC, 8SC (35)
- R11: 18SC, 7SC, 10SC (35)
- R12: 20SC, 4SC, 11SC (35)
- R13: SC in each (35)
- add safety eyes between rounds 10 and 11, 8-9 st apart
- R14: (3SC, dec) x 7 (28)
- R15: 2SC, (1SC, 2dec) x 5, 1SC (18)
- sl st and F.O., stuff
Ears (make 2)
- R1: 7 SC in MR (7)
- R2: 7 inc (14)
- R3: SC in each (14)
- sl st and F.O, leave long tail to sew
- sew each ears between round 6 and 7 of the head
Horns
- R1: 8 SC in MR (8)
- R2-3: SC in each (8)
- sl st and F.O, leave long tail to sew the head above ears
Nose
- ch6
- start in 2nd ch from hook
- R1: 4SC, 3SC in ch, 3SC, inc (12)
- R2: inc, 3SC, inc, SC, inc, 6SC, inc (17)
- sl st and F.O, leave long tail to sew the head
- sew nose to round 9 of 12 of the head
Arms (make two)
- R1: 5SC in MR (8)
- R2: 5 inc (10)
- R3: SC in each (10)
- R4-9: SC in each (10)
- sl st and F.O, leave long tail to sew, stuff
- sew each arm between
Body
first leg
- R1: 6SC in MR (6)
- R2: 6 inc (12)
- R3: SC in each (12)
- R4-6: SC in each (12)
- sl st and F.O
second leg
- R1: 6SC in MR (6)
- R2: 6 inc (12)
- R3: SC in each (12)
- R4-6: 12 SC, ch2 at the end of 6 round
- R7: join to first leg with a sc, 11SC, 2SC in ch2, 12SC, 2SC in ch2 (28)
- stuff legs
- R8: (13SC, inc) x 2 (30)
- R9: (4SC, inc) x 6 (36)
- R10: 1SC, 4SC, 23SC (30)
- R11: 2SC, 4SC, 24SC (30)
- R12: 3SC, 4SC, 24SC (30)
- R13: (13SC, dec) x 2 (28)
- R14: SC in each (28)
- R15: (5SC, dec) x 4 (24)
- stuff
- R16-17: SC in each (24)
- R18: (2SC, dec) x 6 (18)
- stuff some more
- sl st and F.O, leave long tail to sew head
- the spot should be on the front left side
Tail
- SC in 2nd ch from hook (2)
- F.O, leave long tail to sew the body, between rounds 10 and 11
Bag
- 2 circles
- R1: 6SC in MR (6)
- R2: 6 inc (12)
- sl st and F.O, in one circle leave a long tail
- sew the two parts together but leave a small opening
- make a purse strap out of a separate piece of yarn

Frequently Asked Questions
This pattern suggests Himalaya Dolphin Baby, which is a bulky, chenille-style yarn. Using a similar plush yarn will give your baby cow that wonderfully soft, cuddly texture that makes amigurumi so irresistible.
Absolutely! If you’re making this for a baby or small child, embroidering the eyes with black yarn is a safer alternative to plastic safety eyes, eliminating any choking hazard. Felt cutouts can also be stitched on for a similar effect.
To make your cow larger or smaller, simply use a different weight of yarn and adjust your hook size accordingly. A thicker yarn with a larger hook will result in a bigger cow, while a thinner yarn and smaller hook will create a miniature version, all while maintaining the pattern’s proportions.
Stuff your amigurumi firmly but evenly, adding small tufts of fiberfill at a time. Pay close attention to the head and limbs to ensure they hold their shape without becoming lumpy. This creates a neat, finished look for your cuddly creation.
Congratulations, fellow maker! You’ve embarked on a wonderful journey to create a truly special baby cow amigurumi. Each stitch you place adds personality and life to this charming project. Don’t be afraid to personalize your cow with different colors or details – that’s the beauty of handmade. We can’t wait to see your finished creation!