Table of contents
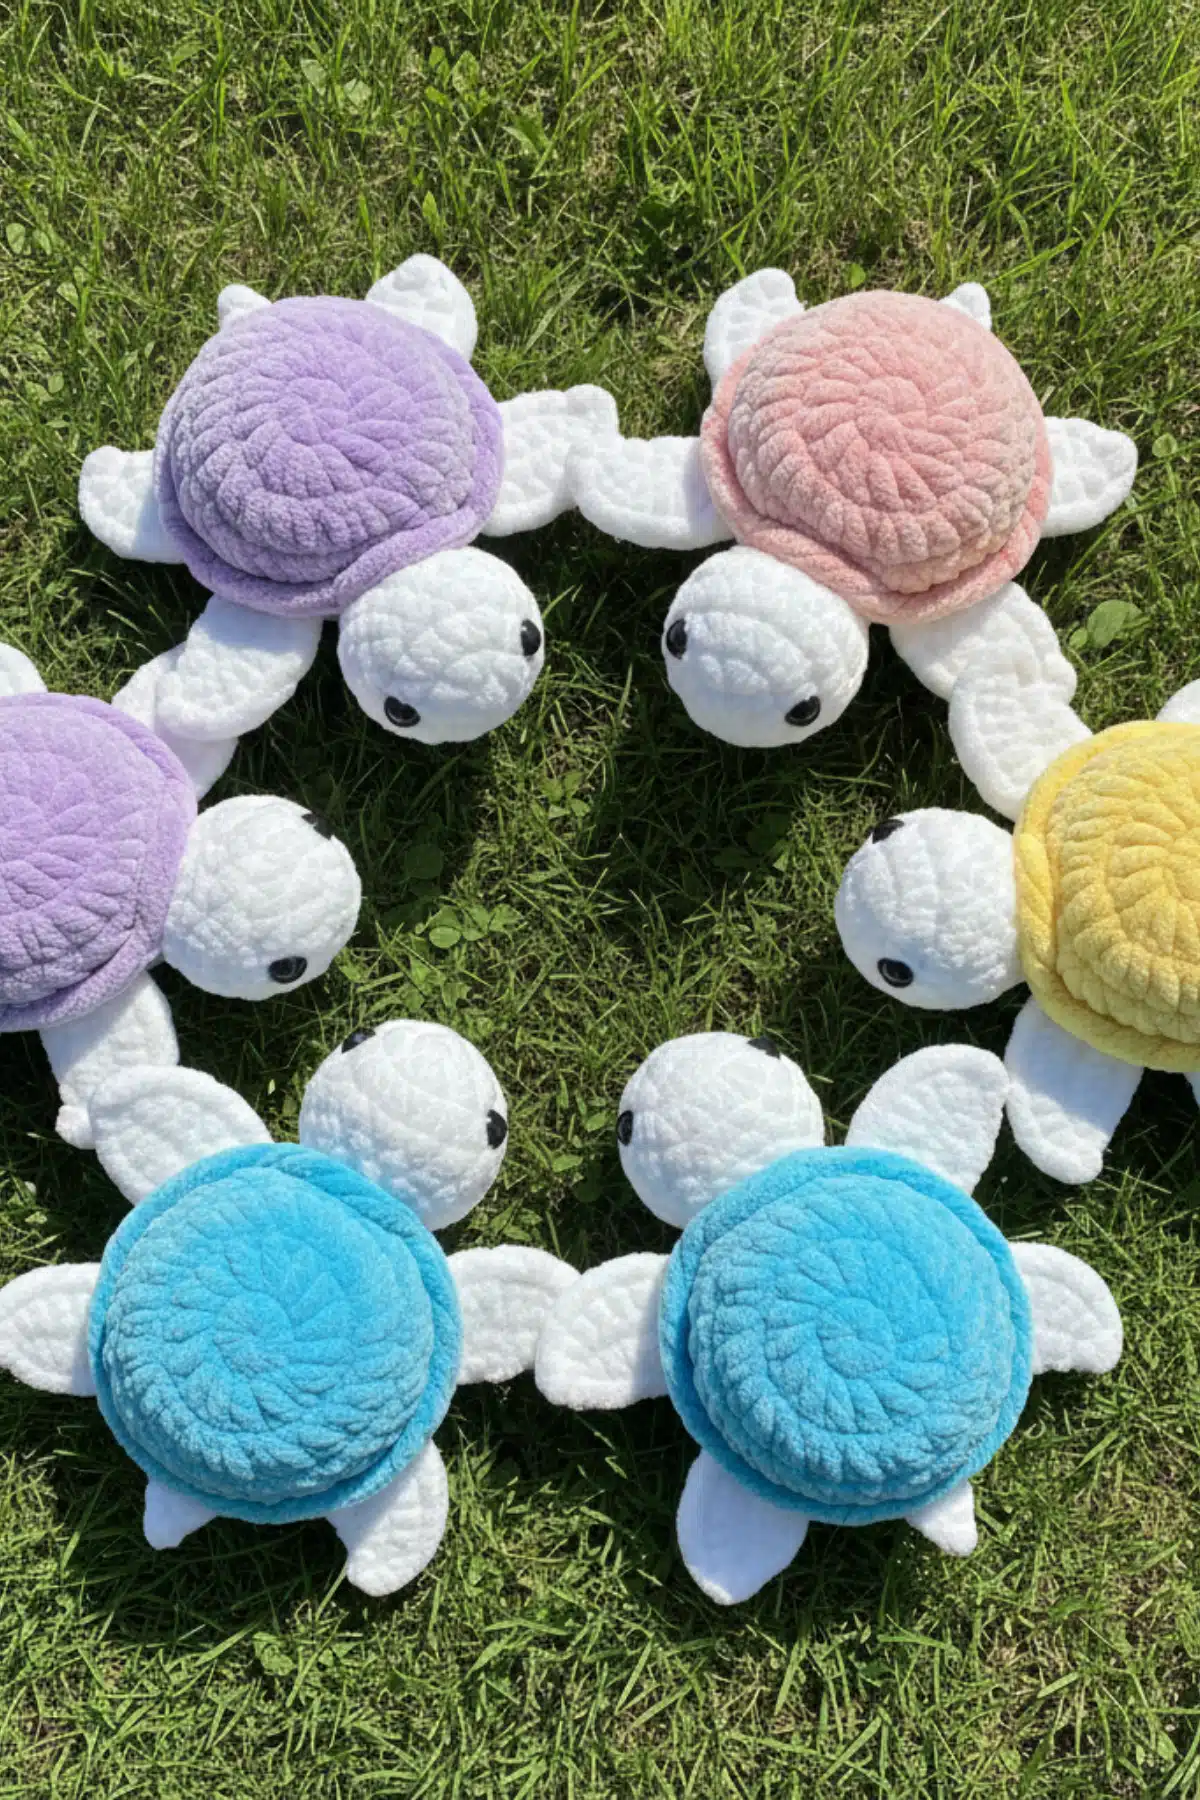
Imagine a tiny, adorable companion, ready to bring a smile to anyone’s face! This delightful baby turtle amigurumi pattern offers a wonderful journey into the world of crafting charming plushies. Whether you’re looking for a heartwarming gift, a cute desk buddy, or a new addition to a nursery mobile, this little turtle is sure to capture hearts. With its sweet head, distinct shell, and cute fins, it’s a project that’s both rewarding to make and lovely to behold. Let’s gather our supplies and dive into creating your very own little sea friend!
Materials Needed for Your Crochet Turtle
To bring your baby turtle to life, you’ll need a few essential items:
- Yarn in two colors: Main Color (e.g., green, blue, brown) and Secondary Color (e.g., light green, cream, yellow for the shell).
- Tip: Worsted weight (Aran/10 ply) acrylic or cotton yarn is a great choice for amigurumi due to its durability and stitch definition.
- Crochet hook (typically 3.0mm – 4.0mm, or a size suitable for your chosen yarn to achieve tight stitches).
- Safety eyes (between row 2-3 of the head, usually 6mm-8mm).
- Fiberfill stuffing.
- Yarn needle for sewing parts together and weaving in ends.
- Stitch marker (optional, but highly recommended for working in rounds).
- Scissors.
Abbreviations Used
- MR: Magic Ring
- sc: single crochet
- inc: increase (2 sc in one stitch)
- dec: decrease (sc2tog – single crochet two together)
- FO: fasten off
- FLO: front loop only
- BLO: back loop only
- ( ): repeat instructions in parentheses for the specified number of times
- [ ]: indicates the total number of stitches at the end of the round
Getting Started: The Head
Let’s begin with the cutest part of our turtle, its little head, crafted in your chosen main color.
Head (Main Color)
- R1. 6 sc in MR (6)
- R2. inc x6 (12)
- R3. (1 sc, inc) x6 (18)
- R4-6. sc around (18)
- R7. (1 sc, dec) x6 (12)
- Add eyes + start stuffing
- Place safety eyes securely between rows 2-3, ensuring they are evenly spaced. Begin to gently stuff the head with fiberfill.
- R8. dec x6 (6)
- FO, close the head
- Leave a long tail for sewing
Crafting the Body and Shell
Now for the main part of our turtle, the body and its beautifully contrasting shell. We’ll start with the secondary color for the shell, then switch to the main color for the body.
Body (Start in Secondary Color)
- R1. 6 sc in MR (6)
- R2. inc x6 (12)
- R3. (1 sc, inc) x6 (18)
- R4. (2 sc, inc) x6 (24)
- R5. (3 sc, inc) x6 (30)
- R6. sc around (30)
- R7. (4 sc, inc) x6 (36)
- R8. (5 sc, inc) x6 (42)
- R9. FLO sc around (42)
Body (Change to Main Color)
- R10. BLO from round 9. (5 sc, dec) x6 (36)
- R11. (4 sc, dec) x6 (30)
- R12. (3 sc, dec) x6 (24)
- R13. (2 sc, dec) x6 (18)
- Start stuffing
- Begin to stuff the body firmly with fiberfill as you continue to decrease.
- R14. (1 sc, dec) x6 (12)
- R15. dec x6 (6)
- FO, close the body.
Shaping the Fins
Our turtle needs its adorable fins! You’ll make two front fins and two back fins, all in your main color.
Front Fins (Make 2 – Main Color)
- R1. 6 sc in MR (6)
- R2. inc x6 (12)
- R3. (1 sc, inc) x6 (18)
- R4. (2 sc, inc) x6 (24)
- Fold in half, crochet together to create a fin.
- FO, leave a long tail for sewing.
Back Fins (Make 2 – Main Color)
- R1. 6 sc in MR (6)
- R2. inc x6 (12)
- R3. (1 sc, inc) x6 (18)
- Fold in half and crochet together to create a fin.
- FO, leave a long tail for sewing.
Finishing Touches: Assembling Your Turtle
With all the pieces crocheted, it’s time for the magic of assembly to bring your turtle to life!
Sew Together
- I like to sew the head over the color change.
- Sew the front fins 1 stitch from the head on round 10.
- Sew the back fins 4 stitches from the front fins on round 10.
Once assembled, give your little turtle a loving squeeze! Enjoy your baby turtle!

Frequently Asked Questions
For amigurumi projects like this baby turtle, acrylic or cotton worsted weight (medium/4) yarn is typically recommended. It’s durable, comes in a wide range of colors, and holds its shape well. Ensure you use a hook size appropriate for your chosen yarn to achieve tight stitches.
To achieve tight stitches that prevent stuffing from showing through, use a crochet hook size slightly smaller than what is typically recommended for your chosen yarn weight. Practice consistent tension and ensure you pull your stitches snugly. Using the single crochet stitch (sc) and working in continuous rounds also helps create a dense fabric.
Stuff your amigurumi firmly but evenly, adding small amounts of fiberfill at a time. Use the back of your crochet hook, a blunt stick, or a stuffing tool to push the fiberfill into all areas, especially the head and body. Make sure there are no lumps or empty spots, but avoid overstuffing, which can distort the shape and stretch your stitches.
FLO stands for “Front Loop Only” and BLO stands for “Back Loop Only.” When you make a regular single crochet, you go through both loops of the stitch. Working in FLO means you only insert your hook into the loop closest to you. Working in BLO means you only insert your hook into the loop furthest from you. These techniques create distinct textures and can be used for shaping or decorative effects in amigurumi.
We hope you’ve enjoyed crafting this adorable baby turtle! Each stitch you’ve made adds to its unique charm, a testament to your creativity and skill. Remember to take pride in your handmade creations. If you’re sharing your beautiful work online, consider tagging the original designer, @crochetbyoline, so they can admire your wonderful creations too. Happy hooking, and may your crafting journey be filled with joy and inspiration!