Table of contents
- Main Body – Cherry Bear Amigurumi Pattern (Head to Body)
- Ears – Easy Cherry Bear Amigurumi Parts
- Cherry Hood – Crochet Detail for Cherry Bear Amigurumi
- Leaf Stem – Decorative Finish for Cherry Bear Amigurumi
- Finishing Touches
- Important Pattern Information
- Frequently Asked Questions
- Conclusion
- You’ll Love Also This
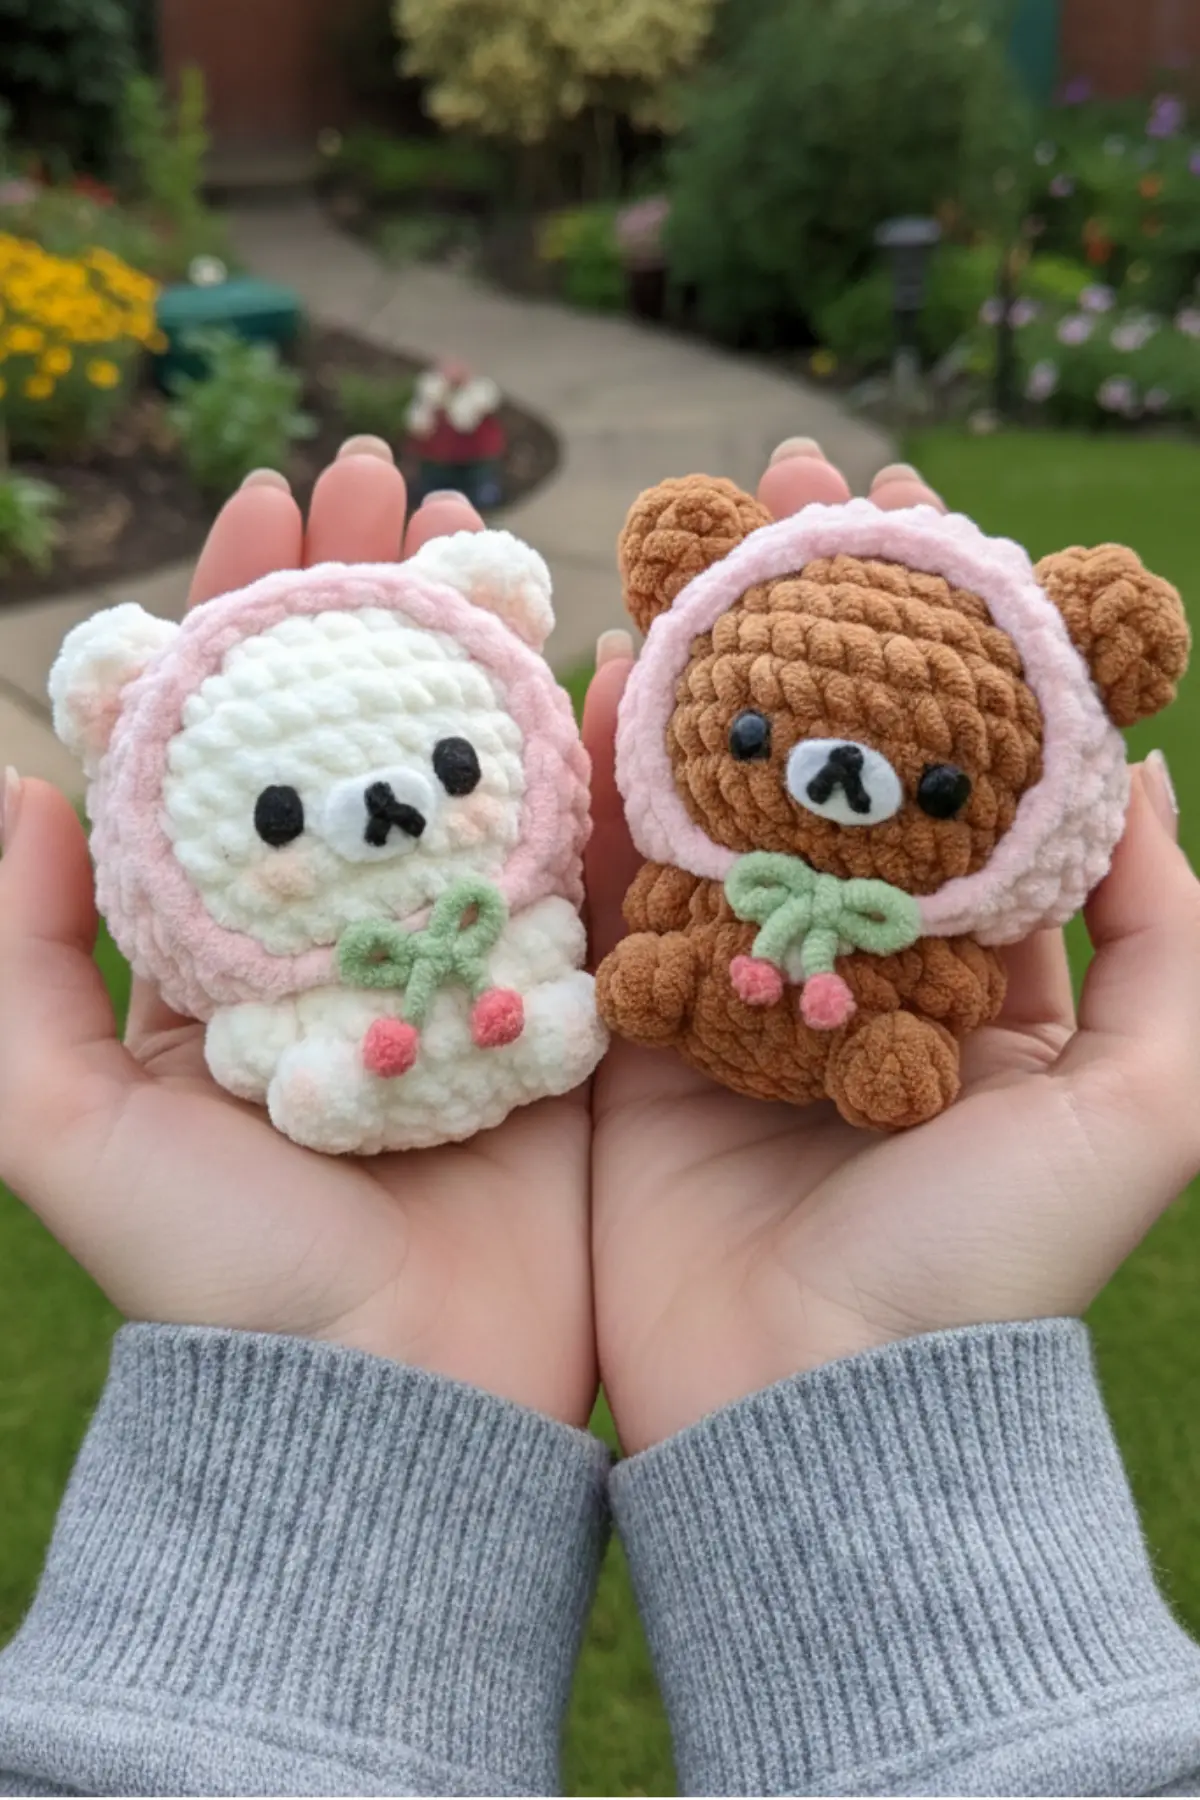
Imagine a tiny, adorable bear wearing a charming cherry-red hood 🍒
This Cherry Bear Amigurumi Pattern is a free and easy crochet project, perfect for creating a cute plush toy for gifts, decoration, or handmade collections. Whether you are new to amigurumi or already experienced, this Cherry Bear Amigurumi Pattern offers a fun, rewarding project with an irresistibly cute result.
Main Body – Cherry Bear Amigurumi Pattern (Head to Body)
We begin the Cherry Bear Amigurumi Pattern by crocheting the head, which flows smoothly into the body. Carefully follow the stitch counts to achieve a perfectly shaped amigurumi bear with a soft plush finish.
- R1: 6X
- R2: 6V
- R3: 6 (X, V)
- R4: 6 (X, V, X)
- R5: 6 (3X, V)
- R6– R9: 30X
- R10: 6 (3X, A)
- R11: 12A
Now, let’s seamlessly transition into the bear’s cuddly body.
Start crocheting the body below:
R12: X, V, X (unfinished 6F, combine and crochet one stitch), V, 2X, V (unfinished 6F, combine and crochet one stitch), X, V, X
R13: 4 (3X, V)
R14: 6X (unfinished 6F, combine and crochet one stitch) 6X (unfinished 6F, combine and crochet one stitch) 6X
R15: 10A
R16: 5A
Leave a long tail for sewing once you’ve completed the main body. This will be crucial for attaching it to other parts later.
Ears – Easy Cherry Bear Amigurumi Parts
These small, rounded ears complete the cute look of the Cherry Bear Amigurumi Pattern. Make two identical pieces and attach them symmetrically to give your amigurumi bear a balanced and adorable appearance.
- R1: 6X
- R2: 3 (X, V)
- R3: 9X
After completing each ear, leave a long tail, fold it in half, and prepare to sew it securely into place on the head.
Cherry Hood – Crochet Detail for Cherry Bear Amigurumi
The cherry hood is the signature feature of this Cherry Bear Amigurumi Pattern. This section adds personality and charm, turning a simple bear amigurumi into a unique crochet plush inspired by cherries.
- R1: 12F
- R2: 12FV
- R3: 9 (F, FV)
- R4: Turn work and crochet 7F, 4CH, K4, 5F, 4CH, K4, 7F
- R5: 9 (X, A), 6CH, SL
Leaf Stem – Decorative Finish for Cherry Bear Amigurumi
The leaf stem adds the final cherry-inspired touch to your Cherry Bear Amigurumi Pattern. This small detail enhances the overall design and makes the finished plush toy stand out beautifully.
Make 3 standing stitches in a magic ring.
Insert the hook into the second stitch and pull up a loop.
Insert into the first stitch and pull up a loop.
Pull the first two loops through and crochet out.
Continue working in the round until the desired length is reached.
Finishing Touches
Once all your individual pieces are crocheted, it’s time to assemble your Cherry Bear! Carefully sew the ears to the top of the head. Attach the cherry hood and then add the leaf stem for that perfect finishing touch. Take pride in meticulously sewing each piece, as it contributes to the overall charm and durability of your finished amigurumi.

Important Pattern Information
Please note that this pattern diagram is shared from Xiaohongshu. For the integrity of the original creator’s work, commercial use of this pattern is strictly prohibited. If you wish to repost or share this pattern, credit and permission from the original creator are required.
Frequently Asked Questions
This pattern is suitable for intermediate crocheters, or adventurous beginners familiar with basic amigurumi techniques like working in the round, increasing (V), and decreasing (A). The unique stitch combinations in the body and hood might require a bit more focus.
After completing the main body, you’ll have a long tail. Use this tail and a yarn needle to carefully whip stitch or mattress stitch the opening of the body to the base of the head. Stuff the head and body firmly but evenly before fully closing to maintain a nice shape.
Yes, you can! Keep in mind that using a different yarn weight will alter the finished size of your Cherry Bear. If you change yarn, be sure to use a corresponding hook size to maintain a tight fabric, preventing stuffing from showing through.
After folding each ear in half, use the long tail and a yarn needle to sew them symmetrically onto the top sides of the head. Pin them in place first to ensure even placement before stitching them securely, checking from multiple angles.
Conclusion
You’ve embarked on a wonderful creative journey and now have an adorable Cherry Bear to show for it! Each stitch is a testament to your dedication and skill. We hope you cherish your handmade companion and feel immensely proud of what you’ve created. Keep crocheting, keep creating, and let your imagination blossom!