
Table of contents
- Materials List for Plush Teddy Bear Crochet
- Crochet Tools for Amigurumi Plush Teddy Bear
- Finished Size of Amigurumi Plush Teddy Bear
- Stitch Guide (Plush Yarn Friendly)
- Amigurumi Plush Teddy Bear Pattern Instructions
- Assembly Notes for Plush Teddy Bear Amigurumi
- Amigurumi Plush Teddy Bear FAQs
- You’ll Love Also This
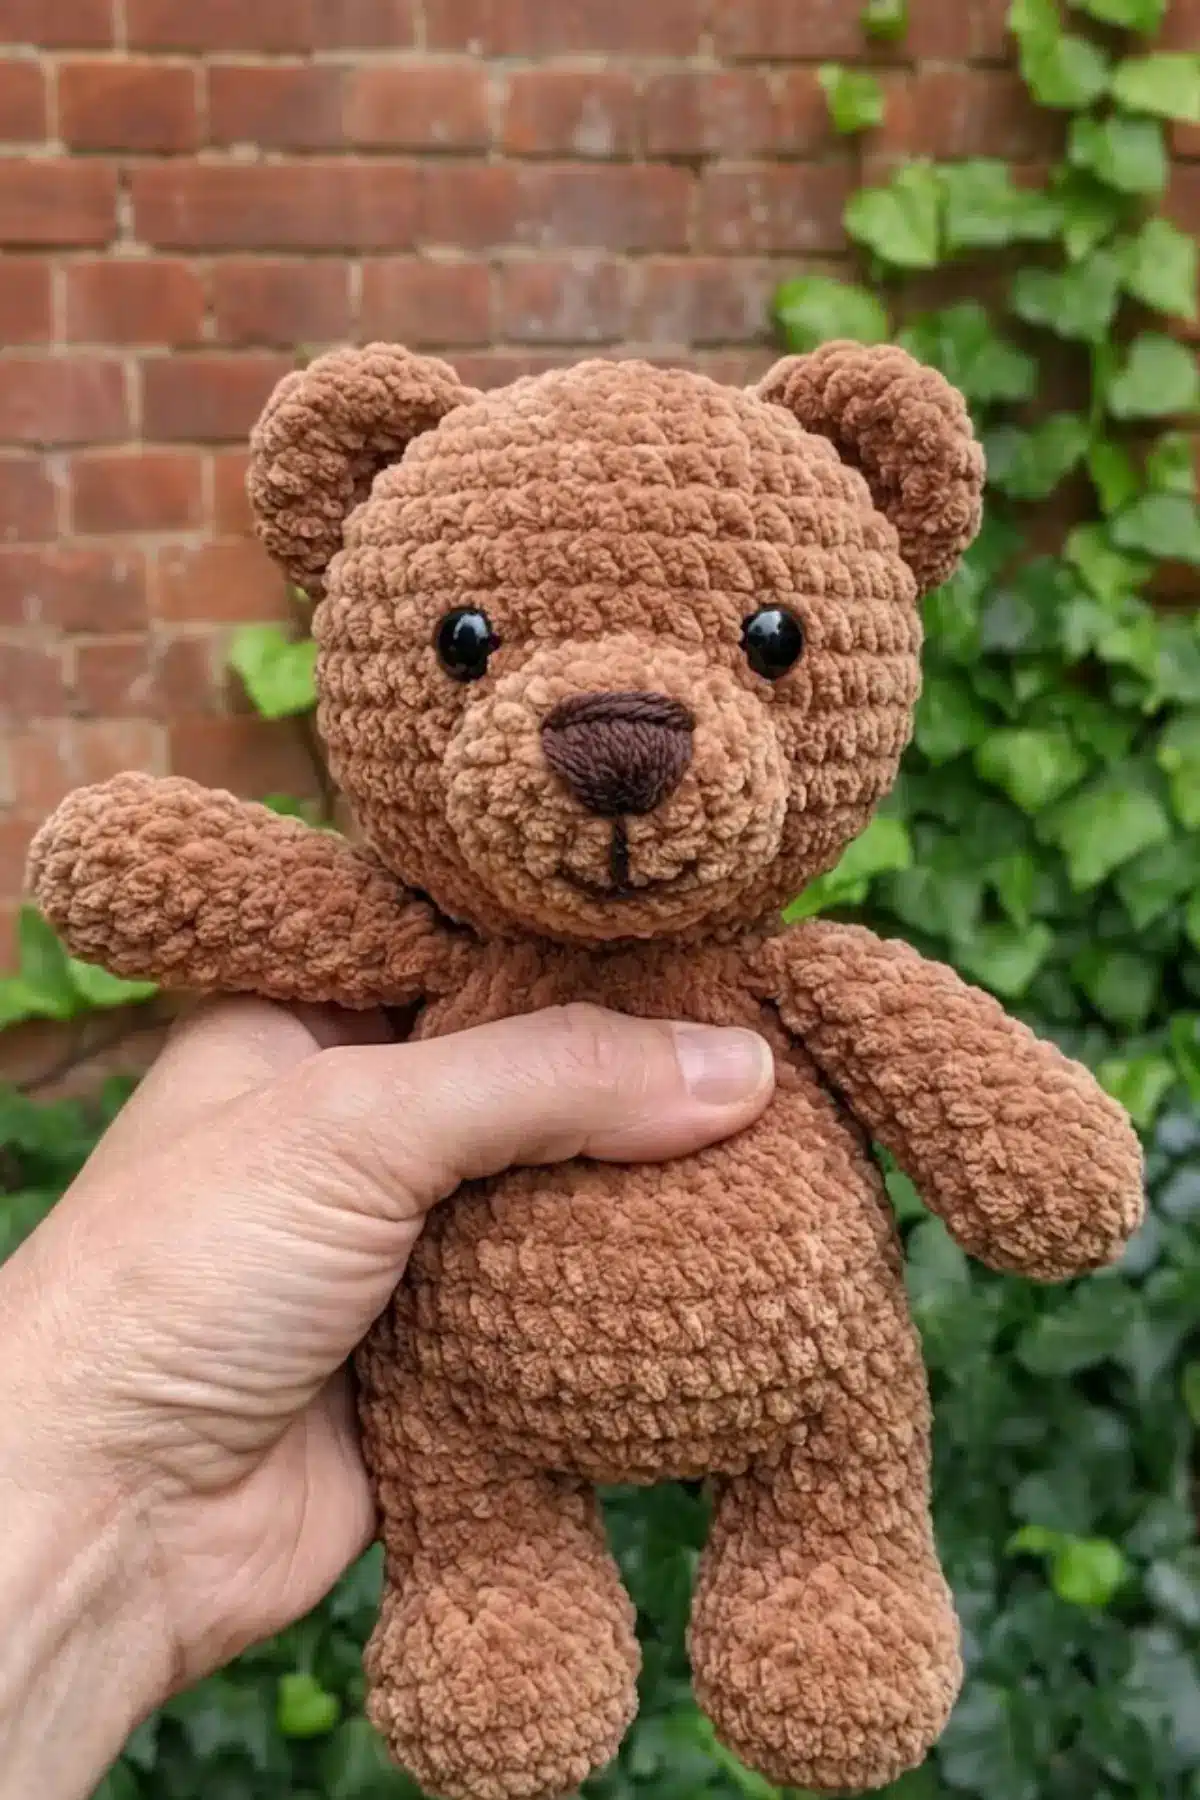
Imagine a world where every hug is extra soft, every cuddle is irresistibly plush, and every handmade gift brings a beaming smile. That’s the world you’re about to create with our Free Easy Amigurumi Plush Teddy Bear Pattern! This beginner-friendly crochet tutorial is designed to help you craft the most adorable, squishy companion using luxuriously soft chenille or velvet yarn. Perfect for gifting to a loved one or keeping as your own sweet desk buddy, this teddy bear will melt hearts with its rounded, pillowy charm and super soft texture. Let’s pick up our hooks and create some magic!
Materials List for Plush Teddy Bear Crochet
- Main Color: Chenille / Velvet / Plush Yarn – Caramel Brown (Super Bulky – Category 6)
- Nose Color: Chenille / Velvet / Plush Yarn – Dark Chocolate Brown
Crochet Tools for Amigurumi Plush Teddy Bear
- Crochet Hook: 6.0– 7.0 mm
- Stitch Markers
- Polyester Fiberfill Stuffing
- Tapestry Needle
- Safety Eyes: 10– 12 mm Black (or embroidered alternative for child-safe version)
- Optional Stabilizers:
- Small felt circle for nose backing
- Plastic pellets or extra stuffing for weighted base (optional)
Finished Size of Amigurumi Plush Teddy Bear
- Height: 22 – 25 cm (8.5– 10 inches)
- Width (head): 10– 12 cm (4– 4.7 inches)
Stitch Guide (Plush Yarn Friendly)
- MR – Magic Ring
- SC – Single Crochet
- INC – Increase (2 SC in one stitch)
- DEC – Decrease (Invisible preferred)
- SL ST – Slip Stitch
- CH – Chain
Maker’s Tip: When working with plush yarn, stitches can sometimes play hide-and-seek! Use stitch markers every 5– 10 stitches to keep track of your progress and ensure accurate counting. This little trick makes all the difference!
Amigurumi Plush Teddy Bear Pattern Instructions
HEAD (Caramel Brown)
- R1: MR 6
- R2: INC x6 = 12
- R3: (SC, INC) x6 = 18
- R4: (2 SC, INC) x6 = 24
- R5: (3 SC, INC) x6 = 30
- R6: (4 SC, INC) x6 = 36
- R7– R12: SC around (36)
- Insert eyes between R9– R10, 6 stitches apart
- R13: (4 SC, DEC) x6 = 30
- R14: (3 SC, DEC) x6 = 24
- Stuff firmly
- R15: (2 SC, DEC) x6 = 18
- R16: (SC, DEC) x6 = 12
- R17: DEC x6 = 6
- Fasten off
SNOUT (Dark Brown)
- R1: MR 6
- R2: INC x6 = 12
- R3: SC around = 12
- Stuff lightly, sew centered below eyes
BODY (Caramel Brown)
- R1: MR 6
- R2: INC x6 = 12
- R3: (SC, INC) x6 = 18
- R4: (2 SC, INC) x6 = 24
- R5: (3 SC, INC) x6 = 30
- R6– R12: SC around (30)
- R13: (3 SC, DEC) x6 = 24
- Stuff firmly
- R14: (2 SC, DEC) x6 = 18
- R15: (SC, DEC) x6 = 12
- Fasten off
ARMS (Make 2)
- R1: MR 6
- R2: INC x6 = 12
- R3– R7: SC around (12)
- Stuff lightly, flatten top, sew to sides of body
LEGS (Make 2)
- R1: MR 6
- R2: INC x6 = 12
- R3: (SC, INC) x6 = 18
- R4– R8: SC around (18)
- Stuff firmly, flatten slightly, sew to base front
EARS (Make 2)
- R1: MR 6
- R2: (SC, INC) x3 = 9
- R3: SC around (9)
- Flatten, sew on top sides of head
Assembly Notes for Plush Teddy Bear Amigurumi
Bringing your little bear to life is the most exciting part! Pay attention to these small details for that perfect plush posture:
- Head: Sew the head slightly forward onto the body to achieve that endearing, cute plush posture.
- Legs: Place the legs wide at the base of the body for optimal sitting balance. This helps your bear sit up proudly!
- Arms: Angle the arms slightly forward when sewing them to the sides of the body to create a welcoming, ready-for-a-hug stance.

Amigurumi Plush Teddy Bear FAQs
Plush, chenille, or velvet yarn in a super bulky (category 6) weight is highly recommended to achieve the soft, cuddly texture shown. This type of yarn gives the teddy bear its irresistible squishiness.
Using stitch markers frequently, perhaps every 5-10 stitches, is crucial when working with plush yarn. Also, working with a slightly larger hook than you might typically use for the yarn can help in distinguishing your stitches and making them easier to see.
Absolutely! For a child-safe version, simply embroider the eyes and nose with black or dark brown yarn instead of using plastic safety eyes and felt circles. This removes small parts that could pose a choking hazard for very young children.
Stuff firmly and evenly throughout all parts, ensuring there are no lumpy spots. For the body, you can add plastic pellets or extra stuffing at the base. This provides a nice weighted feel and helps the teddy bear sit stably on its own.
Congratulations, dear maker! You’ve embarked on a delightful journey to create a truly special handmade treasure. Each stitch you place is a testament to your creativity and dedication. We hope you cherish the process of bringing this cuddly teddy bear to life as much as the finished friend itself. Share your beautiful creations with us – we love seeing what you make! Happy crocheting, and may your hook fly freely!