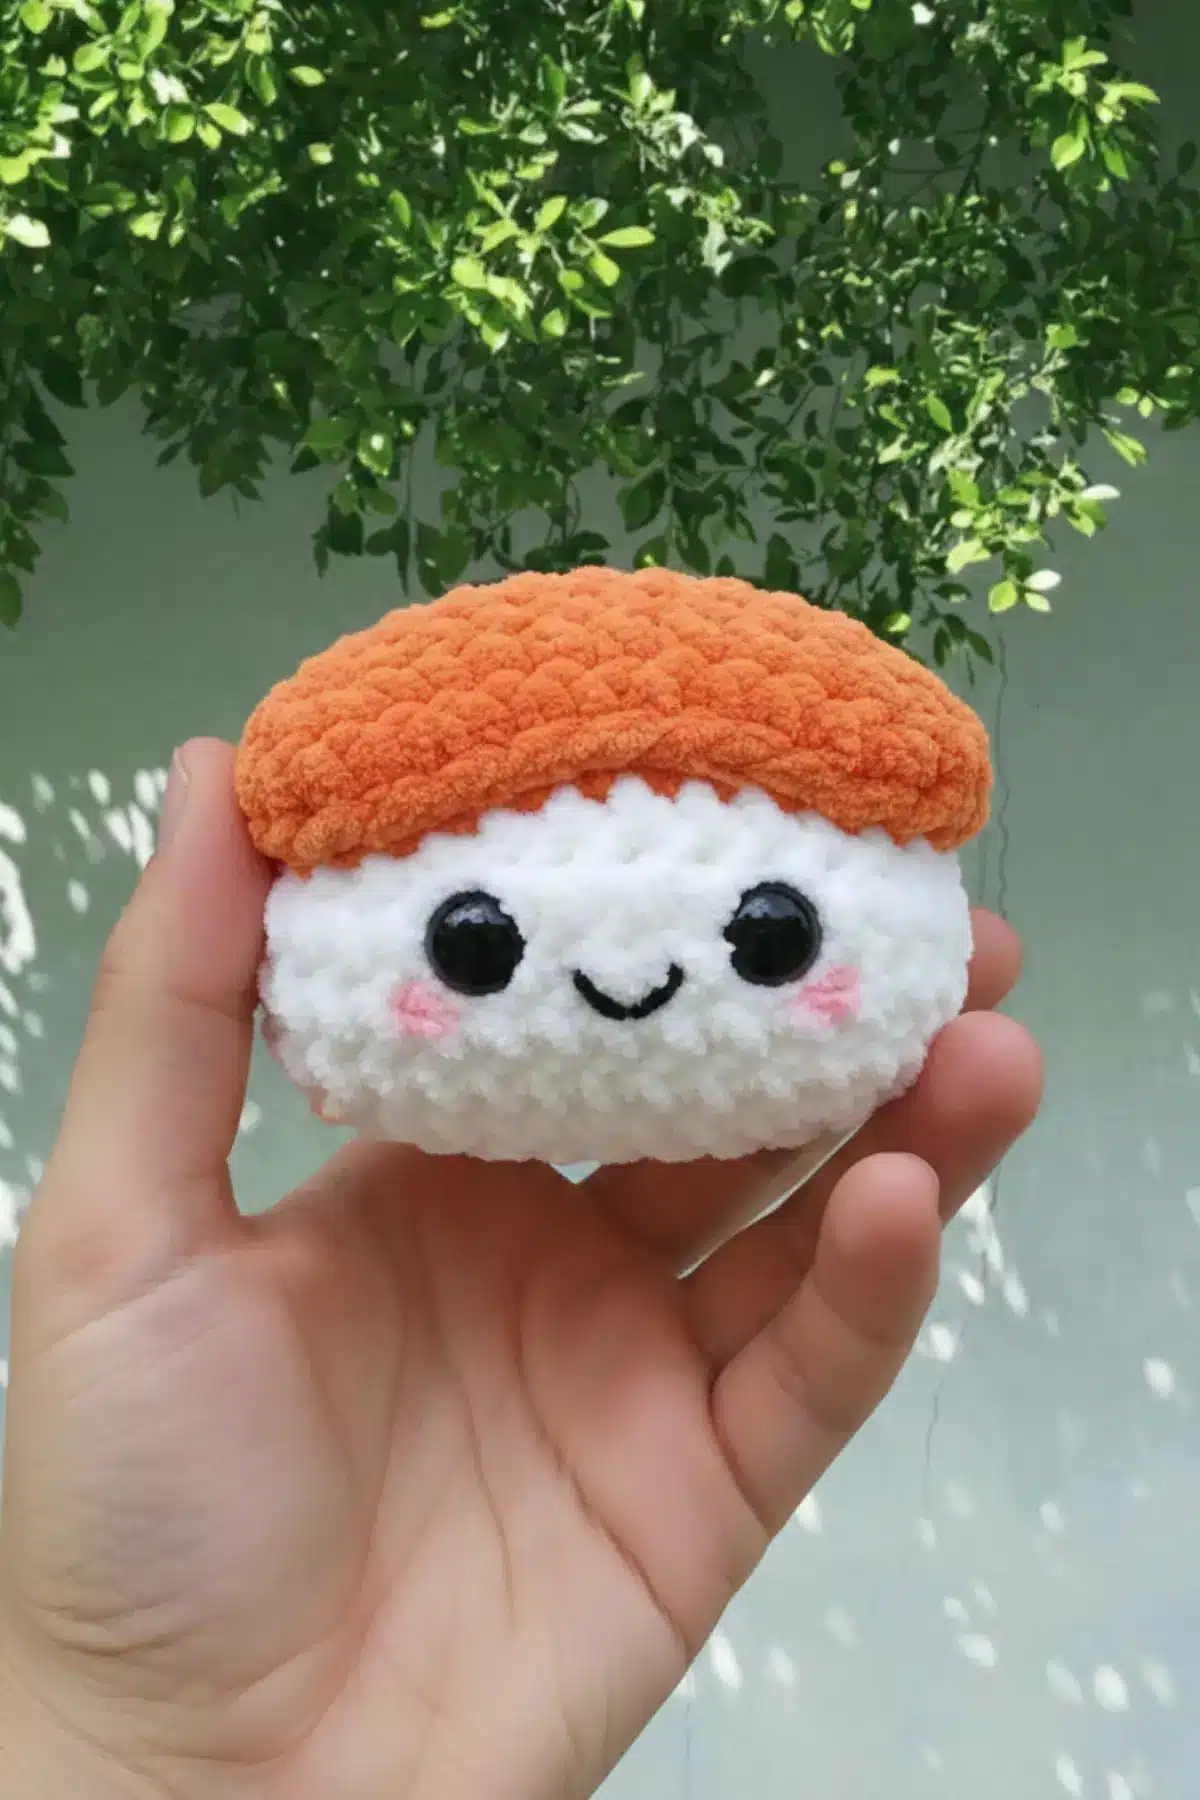
Crochet your own Sushi Friend amigurumi crochet pattern and create an irresistibly soft, squishy plush sushi toy! This beginner-to-intermediate sushi amigurumi pattern is designed especially for chenille or velvet yarn, making it perfect for anyone who loves cute, kawaii crochet projects. With simple shaping, safety eyes, and a charming expression, this crochet sushi plush is ideal for gifts, desk décor, or adding to your amigurumi collection.
Materials Needed for Sushi Amigurumi
- Yarn: Super Bulky (Size 6) Chenille/Velvet yarn (e.g., Bernat Blanket or Himalaya Dolphin Baby) in White and Orange.
- Hook: 5.0mm or 5.5mm (use a smaller hook than the yarn recommends to keep the stuffing from showing).
- Eyes: 12mm Black Safety Eyes.
- Stuffing: Polyester Fiberfill.
- Extras: Small amount of black yarn (for the mouth), pink yarn or felt (for cheeks), and a large-eye tapestry needle.
Abbreviations (US Terms)
- MR: Magic Ring
- Sc: Single Crochet
- Inc: Increase (2 sc in one stitch)
- Dec: Decrease (sc 2 together)
- Ch: Chain
- St: Stitch
Part 1: Crocheting the Rice Base (White Yarn)
We’re starting with the base, crafting a rounded rectangular block that forms the “rice” of our sushi friend.
Foundation: Chain 7.
- Round 1: Start in 2nd ch from hook: 5 sc. In the last ch, do 3 sc (this turns the corner). Working down the other side of the chain: 4 sc, 1 inc in the final st. (14 sts)
- Round 2: 1 inc, 4 sc, 3 inc, 4 sc, 2 inc. (20 sts)
- Round 3: 1 sc, 1 inc, 4 sc, (1 sc, 1 inc) x 3, 4 sc, (1 sc, 1 inc) x 2. (26 sts)
- Round 4–8: Sc in each st around (26 sts).
Note: Insert safety eyes between Rounds 6 and 7, about 4 stitches apart.
- Round 9: 1 sc, 1 dec, 4 sc, (1 sc, 1 dec) x 3, 4 sc, (1 sc, 1 dec) x 2. (20 sts)
- Round 10: 1 dec, 4 sc, 3 dec, 4 sc, 2 dec. (14 sts)
Stuff the body firmly here.
- Round 11: 7 dec. (7 sts)
Finish: Fasten off, weave the tail through the remaining stitches, and pull tight to close.
Part 2: Crocheting the Fish Top (Orange Yarn)
This piece will sit beautifully like a “cap” on your white rice base, giving your sushi friend its delightful topping.
Foundation: Chain 8.
- Round 1: Start in 2nd ch from hook: 6 sc. In the last ch, do 3 sc. Working down the other side: 5 sc, 1 inc in the final st. (16 sts)
- Round 2: 1 inc, 5 sc, 3 inc, 5 sc, 2 inc. (22 sts)
- Round 3: 1 sc, 1 inc, 5 sc, (1 sc, 1 inc) x 3, 5 sc, (1 sc, 1 inc) x 2. (28 sts)
- Round 4–6: Sc in each st around (28 sts).
Finish: Slip stitch into the next st and fasten off, leaving a long tail for sewing.
Assembly & Details
Now for the fun part – bringing your sushi friend to life!
Attach the Top: Place the orange piece on top of the white rice. Use the long orange tail and your tapestry needle to sew the edges of the orange piece to the white body.
Pro Tip: Add a tiny bit of stuffing under the orange piece before closing to give it that “puffy” look.
The Smile: Using thin black yarn, sew a small “V” or “U” shape centered between the eyes.
The Blush: Use pink yarn to sew two horizontal lines just below and slightly to the outside of the eyes.
Squish: Give it a good squeeze to shape it into that perfect sushi oval!
Tips for Working with Plush Yarn
Working with chenille or velvet yarn can be a unique experience, but these tips will help you navigate it like a pro:
Feel the Stitches: Since the yarn is “fuzzy,” you often can’t see the holes. Use your fingers to feel for the next gap. Your sense of touch will become your best friend!
Don’t Pull Too Hard: Chenille yarn can “snap” if you pull the magic ring too violently. Be gentle! Take your time when closing the ring to avoid any breaks.
Mark Your Rounds: Always use a stitch marker. It is very easy to lose your place in velvet yarn, especially when stitch definition is harder to see.

Frequently Asked Questions
Super Bulky (Size 6) Chenille/Velvet yarn like Bernat Blanket or Himalaya Dolphin Baby is recommended for that plush look and feel. These yarns create the soft, squishy texture perfect for an amigurumi friend.
Using a slightly smaller hook helps to create a tighter fabric, which is crucial for amigurumi. This prevents the stuffing from showing through your stitches, keeping your sushi friend looking neat and well-formed, especially with bulky chenille yarns.
Chenille yarn can be delicate due to its construction. When pulling your magic ring closed, do so gently and slowly. Avoid sudden, forceful tugs to prevent the yarn from breaking and ensure a smooth start to your project.
It’s very common for velvet or chenille yarn to obscure stitch definition. Instead of relying solely on sight, use your fingers to feel for the next stitch or the gaps between stitches. Additionally, always use a stitch marker to accurately keep track of the beginning of your rounds.
Congratulations, you’ve created your very own Sushi Friend! Each stitch you make is a testament to your creativity and patience, and the joy of a handmade item is truly unmatched. We hope you cherish your adorable new companion and feel inspired to explore even more delightful amigurumi projects. Happy crocheting, makers!