Table of contents
Why You’ll Love This Watermelon Amigurumi Pattern
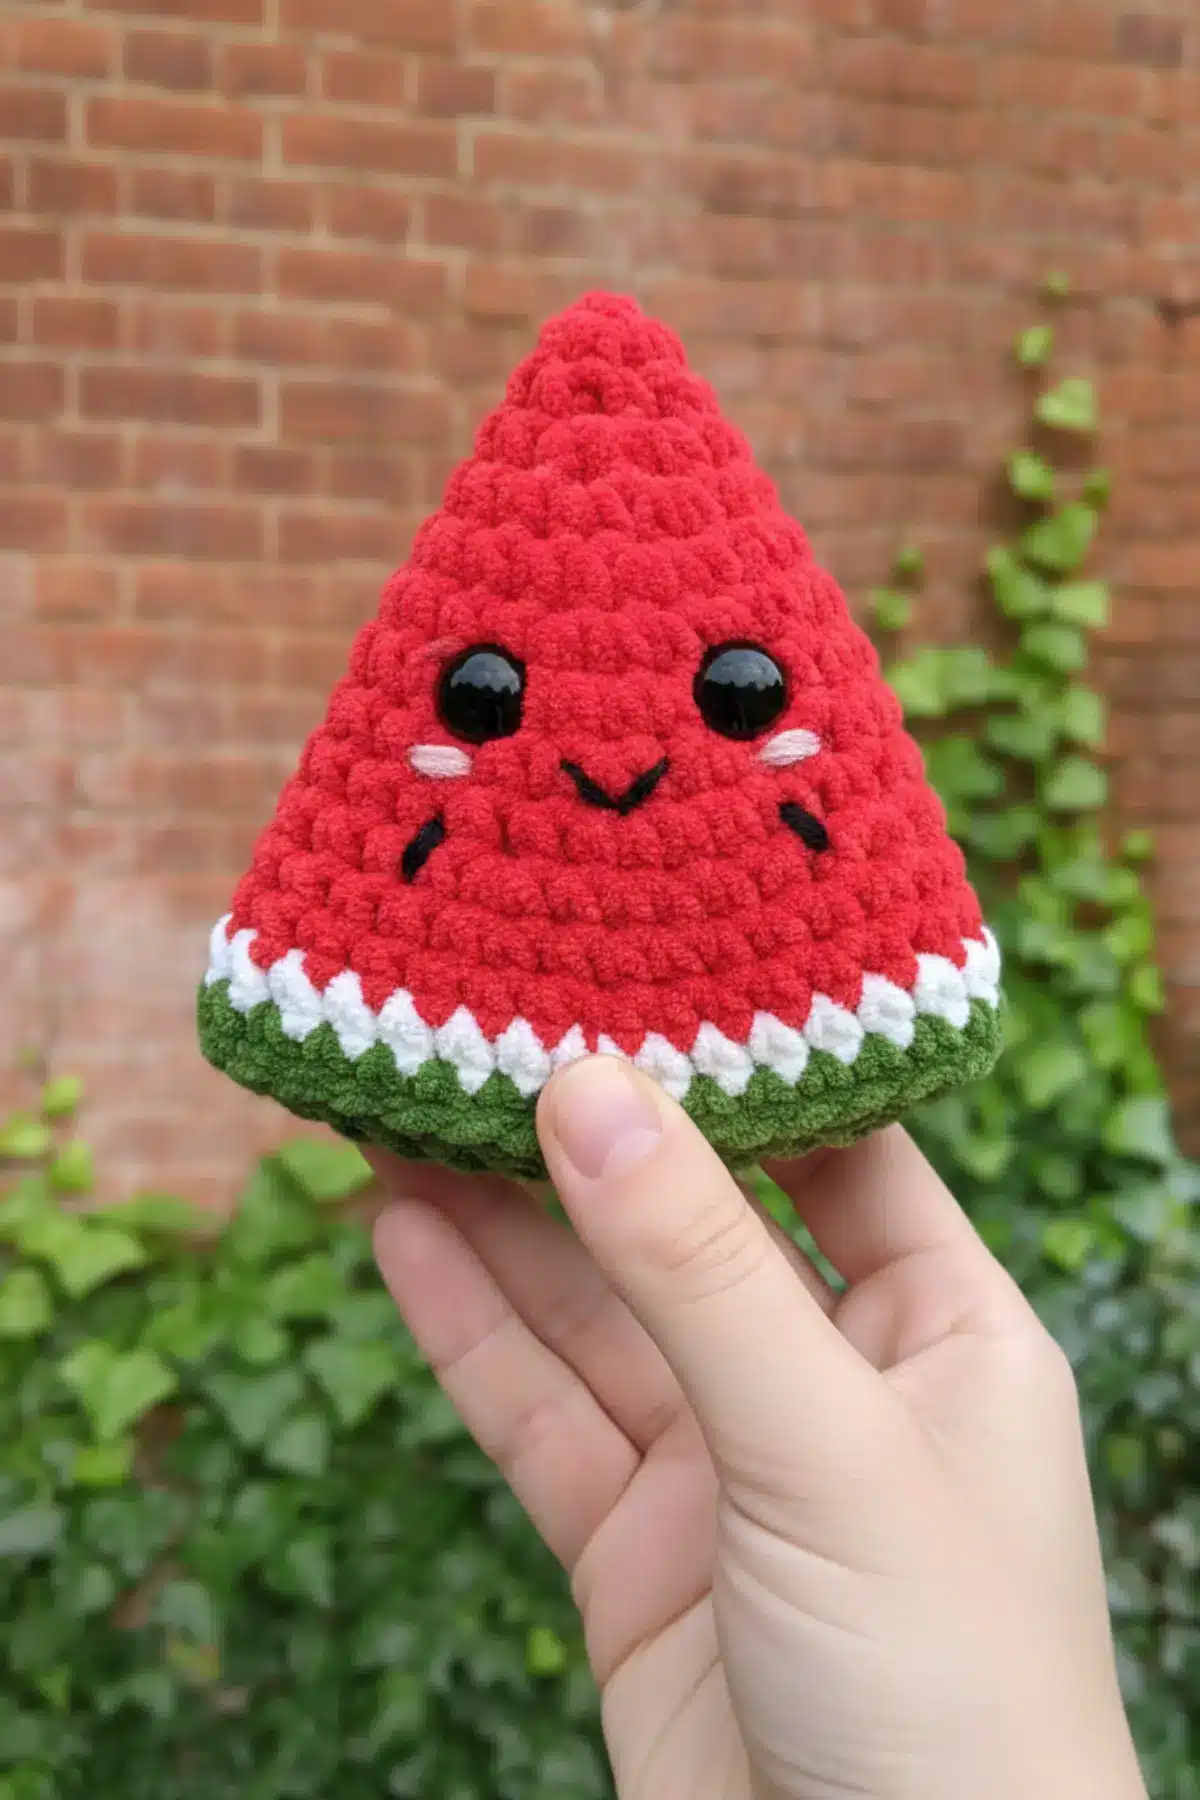
This free watermelon amigurumi pattern combines cuteness with simplicity! Perfect for beginners venturing into amigurumi crochet, this pattern teaches you essential techniques while creating an irresistibly huggable 4-inch plush. The chenille yarn makes this project extra special – wonderfully soft and forgiving for newer crocheters.
This free plush watermelon amigurumi pattern is ideal for beginners who love soft, cute, and kawaii crochet projects.
What You’ll Learn with This Watermelon Amigurumi Pattern:
- Working with fuzzy chenille and velvet yarns
- Seamless color changes for realistic watermelon detail
- Basic amigurumi shaping techniques
- Adding facial features safely and securely
- Creating dimensional fruit-shaped plushies
Materials Needed for Watermelon Amigurumi
- Yarn: Chenille / Velvet / Plush Yarn (Medium Weight #4)
- Red (main color – watermelon flesh): approx. 40g / 45 yards
- Dark Green (skin): approx. 20g / 25 yards
- White (rind border): approx. 8g / 10 yards
- Black (seeds – small amount): approx. 2g / 3 yards
- Recommended Brands: Bernat Velvet, Himalaya Dolphin Baby, YarnArt Dolce, Alize Softy
- Other Materials:
- Crochet Hook: 4.0mm– 5.0mm (G-6 to H-8) — adjust based on yarn thickness and tension
- Safety Eyes: 10mm black (or black felt for embroidered eyes)
- Embroidery Floss: Black (for smile), White or Pink (for cheek blush – optional)
- Fiberfill Stuffing: Polyester (soft, hypoallergenic)
- Tapestry Needle: Blunt tip for sewing
- Stitch Markers: 4– 6 pieces
- Scissors
- Optional: White felt circles (behind eyes for clean finish)
Finished Size of the Plush Watermelon Amigurumi
Approximately 10 cm / 4 inches tall (triangular height). Size may vary based on yarn thickness and hook tension.
Crochet Abbreviations for Watermelon Pattern
- MR = Magic Ring (adjustable loop)
- ch = chain
- sl st = slip stitch
- sc = single crochet
- inc = increase (2 sc in same stitch)
- dec = invisible decrease (insert hook in front loops of next 2 stitches, yarn over, pull through both, yarn over, pull through all loops)
- BLO = back loop only
- FLO = front loop only
- (…) x times = repeat instructions in parentheses
- [number] = total stitch count for that round
Special Notes for Plush Yarn:
- Chenille/ velvet yarn has a fuzzy texture that can hide stitches — use stitch markers frequently
- Work with moderate tension (not too tight, plush yarn needs room)
- Count stitches carefully after each round
- If stitches are hard to see, use contrasting scrap yarn as markers
Pattern Instructions
PART 1: WATERMELON SLICE BODY (RED)
Using Red Chenille Yarn
- Round 1: 6 sc in MR [6]
- Round 2: (inc) x 6 [12]
- Round 3: (sc, inc) x 6 [18]
- Round 4: (2 sc, inc) x 6 [24]
- Round 5: (3 sc, inc) x 6 [30]
- Round 6: (4 sc, inc) x 6 [36]
- Round 7: (5 sc, inc) x 6 [42]
- Round 8: (6 sc, inc) x 6 [48]
- Round 9– 12: sc in each stitch around [48] (4 rounds)
- Round 13: (6 sc, dec) x 6 [42]
- Round 14: sc in each stitch around [42]
- Round 15: (5 sc, dec) x 6 [36]
- Round 16: sc in each stitch around [36]
COLOR CHANGE TO WHITE (Rind Border)
- Round 17: Change to White yarn. Working in BLO, sc in each stitch around [36]
- Round 18: sc in each stitch around [36]
COLOR CHANGE TO DARK GREEN (Skin)
- Round 19: Change to Dark Green yarn. sc in each stitch around [36]
- Round 20: (4 sc, dec) x 6 [30]
- Round 21: (3 sc, dec) x 6 [24]
PAUSE HERE:
- Insert safety eyes between Rounds 10– 11, approximately 8– 10 stitches apart
- Begin stuffing the watermelon firmly with fiberfill
- Round 22: (2 sc, dec) x 6 [18]
- Round 23: (sc, dec) x 6 [12]
Continue stuffing as opening decreases
Round 24: (dec) x 6 [6]
Fasten off, leaving a 15cm / 6- inch tail. Thread through remaining 6 stitches, pull tight to close. Weave in end securely.
PART 2: FACIAL FEATURES
Eyes (Already Attached)
- Safety eyes inserted at Round 10– 11, positioned symmetrically
- Alternative: Embroider with black yarn or sew black felt circles
Cheeks (Optional)
- Using white or pink embroidery floss, stitch 2– 3 small horizontal lines below each eye to create kawaii blush marks
Smile
- Using Black Embroidery Floss:
- Thread tapestry needle with 2 strands of black floss
- Position smile between Rounds 12– 13, centered below eyes
- Create a curved smile using backstitch or satin stitch
- Shape: gentle “V” or curved smile (approximately 10– 12 stitches wide)
PART 3: WATERMELON SEEDS
Make 3– 5 seeds using Black Chenille Yarn
Seed Pattern:
- Row 1: Ch 4
- Row 2: Starting in 2nd ch from hook: sc, inc, sc [4]
- Row 3: Turn. Ch 1, sc across [4]
Fasten off, leaving a 20cm / 8- inch tail for sewing.
Attach Seeds:
- Position seeds randomly across the red watermelon section (Rounds 7– 14)
- Sew securely using tapestry needle and yarn tails
- Suggested placement: 1– 2 seeds near center, 1– 2 toward edges
- Weave in ends on the inside of the plushie
Assembly & Finishing
Shaping the Triangle
Your watermelon slice should naturally form a rounded triangular wedge shape:
- Flat green base (bottom of watermelon)
- Curved red top (flesh side)
- White zigzag border creates the rind separation
Optional: Enhanced Stability
If your plush is too soft and loses shape:
- Insert a small oval felt piece inside the green base before final stuffing
- Add a thin cardboard insert (covered in fabric) for a firmer base
Final Touches
- Check all yarn ends are woven in securely
- Shape the plushie by gently squeezing and molding
- Fluff the chenille yarn with your fingers to enhance the fuzzy texture
- Steam lightly (optional) to even out any tension variations — hold steamer 6 inches away, never touch directly

Frequently Asked Questions
This pattern is specifically designed for soft plush, chenille, or velvet yarns like Bernat Velvet or Himalaya Dolphin Baby. These yarns give your watermelon a wonderfully huggable and fuzzy texture, making it extra cuddly and perfect for a kawaii aesthetic. Using a different yarn type will alter the finished size and texture.
Absolutely! This pattern is crafted with beginners in mind. It primarily uses basic stitches like single crochet, increases, and invisible decreases. Detailed step-by-step instructions and specific notes for working with plush yarn are included to guide you through creating your first adorable amigurumi project with confidence.
If you find your plushie is a bit too soft or loses its triangular shape, you can enhance its stability. Consider inserting a small oval piece of felt inside the green base before your final stuffing. For an even firmer base, a thin piece of cardboard, covered in fabric, can also be used as an insert. Remember to stuff firmly and evenly for the best shape.
Yes, absolutely! While 10mm safety eyes are recommended for a classic amigurumi look, you can certainly embroider the eyes with black yarn or sew on black felt circles for a softer, child-safe option. Similarly, the cheek blush can be embroidered with white or pink floss, and the smile can be created using black embroidery floss with a backstitch or satin stitch technique.
Congratulations, fellow maker! You’ve not only crocheted a charming watermelon slice but also honed your skills and created something truly unique with your own hands. Embrace the fuzzy texture, the sweet little smile, and the satisfaction of a handmade creation. We hope you cherish your new plushie and that this pattern inspires many more delightful amigurumi adventures. Happy hooking!